Thursday, July 27, 2006

Attaching a Hanging Sleeve

After you have machine sewn on your binding to the front of your quilt (my explanation of binding a quilt starts with squaring a quilt up at here and finishes with the binding in the next two posts) you are ready to attach a hanging sleeve. Most quilt shows and quilt competitions require a 4” hanging sleeve to be attached to the quilt and it is far easier to attach the sleeve into the binding before you turn the binding to the back rather than sew it on later and do it entirely by hand. This is the method that I use to attach a standard 4” hanging sleeve with room for the rod.

Cut a strip of your backing fabric that is 8 ½” or 9” wide by the width of your quilt. I do this easily by laying an 8 ½” strip of fabric across the width of my quilt and and cutting it the length needed. It cuts out the step of having to measure it with a tape measure :) In the picture you can see the back of the fabric I am going to use for the sleeve.


Take the fabric to your ironing board and do a double turn under at each of the short ends. I generally turn under1/4” to 3/8” for each turn.


Now take the sleeve to your sewing machine and using thread that matches the fabric sew the hem down. I really like to take this opportunity to use some of the decorative stitches on my sewing machine. Many people say that they don't use their decorative stitches but this is a great chance to try some of them out and it adds a nice embellishment to the quilt. I usually try to choose a stitch that will compliment the front of the quilt somehow.


Next take your sleeve back to the ironing board and fold it about ¼ of the way up and press all the way down the length of the sleeve.


Take your sleeve back to the sewing machine and sew ¼” along this fold using your longest stitch length or a “basting” stitch. You do not want to use a short stitch length here because we will be taking these stitches out later.


Moving again to the ironing board fold the two raw edges together and press a crease in. The little sewn “tuck” will be standing up. Make sure that you stretch out the fabric so that there is not extra fabric in the tuck. We want the tuck to be only ¼” and no bigger or it will show past your binding from the front. Your sleeve is now ready to be sewn onto your quilt.


Take your quilt and your sleeve to your sewing machine. Center the sleeve onto to top of your quilt. You will have a small amount on either end where the sleeve does not touch. This is where your binding will be folding to the back and where your hangers will go to hang it on the wall. Sew the sleeve on to the quilt using less than ¼” seam allowance. If you use a bigger on it will go into the binding.


Now you are ready to hand sew down the back of the sides and the bottom of the hanging sleeve. Use the same blind stitch that you used for the binding. After the stitching is done remove the basting stitch from the sleeve and you will have a bit of extra fabric in the sleeve to accommodate a rod. If you don't put this extra bit of fabric in the quilt will pull over the top of the rod or the rod won't be able to go in at all.

I will add to this post once I do the hand work to show the finished sleeve but it is just too humid right now to have the quilt on top of me to do the hand stitching. So there will be more soon :)

I hope that you all enjoyed this blog on the hanging sleeve. If you have any questions or comments please feel free to post them here and I will see if I can answer them.

Tuesday, July 25, 2006

Day Out with Thomas

This weekend we drove about 800 km to St Thomas Ontario to go to "Day Out with Thomas." This was the only Canadian stop on the tour. My youngest son, the one who also loves pumpkins and orange, is a big Thomas the Tank Engine fan and we promised him last year that we would go if it came back to Ontario. You can see from the picture that Thomas looks wonderful! It was really amazing to see the engine and how great he looked. All the kids around were really excited and happy to see him. We went on a 25 minute ride on Thomas and it was the first train ride that my boys had ever had so that was really exciting for them. I really have to say that if you have a little Thomas fan in the family take them to this event because it is worth it! You can go to the web site here to check out show times if you want.

I took a lot of photos of the event and I am thinking of making a photo quilt of the day. I'll have to find some Thomas fabric though. Somebody must make Thomas fabric right?

Today I spent a few hours machine quilting a quilt for some friends who are celebrating their 10th aniversary. When they were married I hadn't started quilting yet so they didn't get a quilt. Since then every one of our friends has receieved a lap size quilt as their wedding present. So, I thought that it would be nice to give them a quilt to celebrate their aniversary. You can see a picture of the top here and I will post pictures of the finished quilting maybe tomorrow.

I am going to continue my binding series of posts with this quilt as well. I will be showing how to attatch a hanging sleeve to the back of your quilt. So stay tuned!

Thursday, July 13, 2006

Funny Pumpkin Things

Hi all;
You Are

A Classic Pumpkin Face

You would make a good pumpkin pie.
I did another blog thing because my youngest son, Gavin, (5) LOVES pumpkins. You can see him here in my Preemie Quilts post. Well actually it isn't limited to just pumpkins it is anything orange. You can see him holding his very first quilt here it is one that he gave away to a little preemie baby in need.

We are going to work on his second quilt this summer. We have been collecting fabrics for quite a while for it. It is so wonderful to go into a quilt shop with him. He immediately finds the brightest orange fabrics that he can find or ones with pumpkins on it. Now, he doesn't like just any pumpkin fabrics. He likes pumpkins with happy faces on them :)

I made the quilt on the left for him for a nice little halloween quilt that he could hang in his room. He looked at it for a while with a quizzical expression on his face and when I asked him if he liked it he said "No" very seriously. I asked him why and he said "because they don't have happy faces like these ones" and he pointed to the pumpkins on the border fabric!


So I promptly made him the next quilt! Notice that all the pumpkins are happy and smiling. That is another one of his requirements :)

So when I did the pumpkin blog thing and found out that I was the classic smiling pumpkin I just had to laugh and post about how important happy smiling pumpkins with faces are.

I should mention that these two free embroidery designs came from Ann the Gran.

We are almost finished collecting fabrics for Gavin's quilt. Just a few more key pieces to go and we will be all set.

The other part that made me laugh about the Pumpkin blog thing was the thing about how I would make a good pumpkin pie because one halloween Gavin begged me to make a pumpkin pie from the whole pumpkins we had. I spent the day baking the pumpkins, making the filling, making the pie crusts and finally making the pies. Everything was made from scratch and using only the best ingredients. I really wanted to make these pies special for him. They were wonderful except for one thing. No one else in my family (except me) would eat them. They all decided that they didn't like pumpkin pie so I was left with two fresh pumpkin pies that had taken me the better part of a day to make and a whole bunch of pureed pumpkin. Needless to say and awful lot of pie was given away that day :)

Wednesday, July 12, 2006

More Photo Fun!

Hi all;
This is the other block that my friend Marion did for our guild tinners group. You can see the first block here. You should check it out if you haven't seen it already.

In this block the woman whose tin it was is on the right all dressed up like "The Quilt Diva" you may be familiar with that quilt you can see the pattern here. (I have never ordered from this company or anything I just found it here on-line). Two more participants in our group are under the hair dryer. The beauty salon pictured is Sandy's actual beauty salon.

Isn't this block wonderful! Well done Marion!! If you want to let Marion know how much you like the block you can post it here and she will see them.

Monday, July 10, 2006

No too much going on

It has been hot and beautiful here lately so I have to say that I have been doing lots of stuff outside and I have not been quilting very much. I don't know if I am wierd or not but I don't find hot summer weather very quilty. I have been making some preemie quilt tops (pictured here). I find that that is always a good way to keep quilting while doing something for charity.

As I was saying the hot weather doesn't motivate me to quilt very much. Maybe it's because I just don't want the fabric on me or soemthing. maybe I'm just in a bit of a quilty slump. What do you guys do to get motivated and going again? I would love to have some advise!!


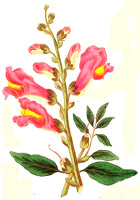
I am a
Snapdragon


What Flower
Are You?


I did this fun blog thing about what type of flower I am. I've never thought of myself as a snapdragon but hey you never know. Here's what the test said
"Mischief is your middle name, but your first is friend. You are quite the prankster that loves to make other people laugh."
I do love to laugh but I've never thought of myself as a prankster; but, hey maybe I am :)

Saturday, July 01, 2006

Happy Canada Day!!

Happy Canada Day Everyone!

This is a picture of my Canada Day quilt hanging in the wondow of my quilting room. I made this a few years ago to hang in this window for Canada Day. I get lots of compliments on it every year from people walking by to go to the celebration in the park down the street.

I think that the pattern was from a Quiltmaker magazine but I don't remember, sorry. I did it using 2" squares on the fusible pellon grid so that it was really easy to sew.

We went out for a hike today to Eagles Nest Peak in Calabougie with the kids and here is the view from the top. Isn't it spectacular? You hike up the mountain until you get to this shear drop off with a view of the Ottawa valley. It is really breath-taking.

It is wierd that I have lived in this area for a several years now and we've never gone to see this view before. It really makes me wonder about all the things to see and do that are right at your door step. Sometimes I think that we all concentrate on what else there is to see instead of looking at where we live.

What better way to celebrate Canada day than to go and see a part of Canada that you've never seen before :) It's been rainy here so the deer flies were out in full force but other than that it was great.

2022 Christmas T-Shirt Quilt Gift

As promised - here is the T-Shirt Quilt Christmas Gift from 2022! I did share this on my Facebook page but not on my blog, (whoops sorry!) s...