Monday, December 31, 2012

Adding Machine Embroidery to Rag Quilts

Hi all!

I hope that everyone has a great New Years Eve tonight and I hope that everyone is safe and having fun!

Since I have a cold and my brain is fuzzy I was looking for something easier to do to keep myself busy.

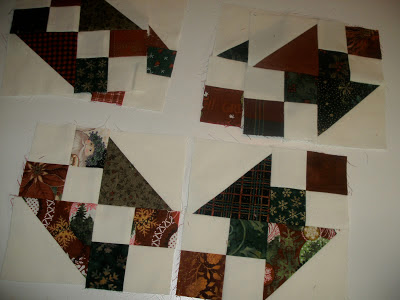
I decided to start quilting the rag quilt that I have cut out.  Since I am a little tired of the big X through the middle of the blocks I decided to add some machine embroidery (ME) quilting motifs to the middle of the blocks.  When I posted this to my facebook page I got a couple questions about it so I thought that I would post a little tutorial on it.

I like to add machine embroidery to my rag blocks - but - I like to add looser designs that simulate the effect of quilting.  If you want to add something with a satin stitch or something more intricate you will HAVE to stabilize your blocks much more than I do with these lighter designs.

First I die cut my rag blocks and layer the bottom layer, batting and top layer.   You can see the dies cut fringe pocking out of the hoop.


I decide what design I want to do and pick my hoop accordingly.  You want to make sure that your design is big enough to hold the batting in place.  If it is not large enough then your batting will sag and your quilt will be lumpy.   

I am pretty casual with the way that I hoop this.  I have done more with my hooping and I haven't really found that it affects the design at all - unless it is a more detailed design with a lot more stitching.  So, you can see that here I have just the two sides caught in the hoop edges making sure that I have the fabric centered.


Load up your hoop and stitch out your design.


After the design is finished unhoop and trim threads.  This design took about 4 minutes to stitch out.  As you can see it is a quilting design not a really intricate one.  But, can you see the way that the design goes to edges of where the batting is?

Now you'll just sew your rag quilt together as normal.

Options - you can hoop a wash-away stabilizer and then just baste your rag block to the top and stitch out your design.  You can also use a product like Hoopables to stabilize your block.  I have only found this necessary if the ME design has more stitches to it.  You'll have to play around to see what works best for you.

I know that some of you are probably thinking - wow, that takes a lot longer.  Yes and no.  It does take a bit longer but while the design is stitching I am able to be doing other things like prepping more blocks rather than sitting at the machine stitching the X.  And, sometimes, you have a quilt that is just worth the extra!

I'm still ME blocks for not one but two quilts and having fun.  I'll post a few pictures once I am further along.

Happy New Years everyone!

Sunday, December 30, 2012

Sick Day Sewing

Hi all!

As you can probably tell from the title of this post - I am sick.  Blah!  Just a bad cold ie, fever, chills, sore throat, runny nose, achy and tired body.  You know the drill.  In short -it sucks!  I am probably one of the worst people when I get a bad cold like this too.  I get frustrated and cranky because I am fed up with being sick.  And I get bored!  I hate laying around all day - unable to do anything - and when I try to do something I mess it up because I can't think straight.   LOL!  Ok enough with the pity party for me.  I just want to get rid of this cold because I have stuff that I want to do!

 So, as I looked for something easy, I thought that I would play with my new tote bag die and make a couple tote bags.  


The one on the right was my first one made out of some fabric that I bought (no idea why!) a long time ago so it was perfect to be the test one.

The one on the left is my second one made from a Northcott panel from a while ago.  Funky but I managed to not get the center of the focus area right in the center of the bag.  Oh well I still like it!  I also used a slippery polyester lining fabric I bought gobs of a few years ago so I thought that it might work for bag linings.  I actually like this for a lining fabric - it's just a little fussier to use.

What I would like to do with this is make this into a class to teach.  We kit up the entire tote bag, outer fabric, lining, batting and handles - all die cut - so that people just come in and sew.  Wouldn't that be fun?  Come to a class and leave with a finished tote and lots of options for embellishing future totes!

Would you want to take a class like that if the cutting was all done for you ahead of time?

Ok time to pull out some more fabric for more totes :-D

Friday, December 28, 2012

Snowflakes for Sandy Hook

I think that all of us have been affected by the events in Sandy Hook.  And I think that we have all wished that there was something, anything, that we could do.

Thank you to SewCalGal for posting something small and concrete that we can do.

There is a call for Snowflakes, by the PTA for the school in Sandy Hook.  Snowflakes are wanted to decorate the school, for when the kids return in January.  These can be paper, fabric, machine embroidery, mixed-media arts, etc.  

For those with a fabric die cutter snowflake this is a great time to make some snowflakes. 

EmbLibrary is also giving a free machine embroidery snowflake design away to encourage those with ME machines to help make snowflakes.

Sarah Vedeler has made one of her snowflake embroidery designs available for a short period of time.

Please make and send snowflakes by January 12, 2013 to the Connecticut PTSA address

Connecticut PTSA
60 Connolly Parkway
Building 12, Suite 103
Hamden, CT 06514 USA

I wanted to do this activity with my two boys so that we could talk about what happened together.  So, I came up with something simple that we could easily do.

Since I have two Go! dies with snowflakes on them I decided to use those to make snowflakes to hang in the school.

We placed paper over the are of the die that we wanted to cut and placed a cutting mat on top and ran it through the cutter.


Nope that's not my hand!  Here is my oldest running the Go!


 My youngest was manning the Studio cutter with the adapter pad to get pretty snowflakes.  You can embellish these anyway that you would like.


As an aside - the paper that comes on the Studio dies, between the label and the die, is perfect for this!  It is good sturdy, slightly shinny, card stock.


Next we punched a hole in the top of each snowflake and placed a Christmas tree ornament hanger in each.  You could also use fishing line and tie a loop or how ever else you would like to hang them.


And now we have a pile of snowflakes that I will mail out today!  This gave us a great opportunity to talk about the events and my kids feel good that they were able to do something small but tangible to help the children in the school feel better.

Some of you might be wondering why I didn't do machine embroidery or something harder.  Well, my two boys made all of these will my help only on the first couple - the rest was completely them.  That is why I didn't do something harder.  I wanted this to come from their hands.

I encourage you all to cut a few snowflakes.  I know that many of you have at least one snowflake die, or machine embroidery design and I am sure that you could make at least one snowflake to help welcome a sad child back to school.

Let's Sew it Together!

Hi all!

I so wanted to have this top together before Christmas but, well, life and the holiday season got in the way.  Better late than never LOL!

The next steps are pretty straight forward now that we have our blocks together.


Sew the blocks into 6 rows of 5 blocks (unless of course you have made a larger quilt).  I just tried to not have two like prints next to each other in the HSTs.


Next sew the rows together and press.  Look at all those secondary stars!  How cool are they!?  I also love how the chains just jump right out at you.  Stars and chains are two of my favorite things in a quilt and this quilt includes both!

The next, and last, step is to put on borders.  I am auditioning a few different prints that I have yardage of in my stash so I think I will probably go with one of them.  I'll put up another post on this later.

So how is yours coming along?  Add a link to your blog post showing your top if you like so that we can all share or you can add a picture to my facebook page.  Any questions?  It's pretty straightforward at this point I think.

If you are enjoying my QAL I hope that you will follow my blog - it's easy just click on the follow area under my picture.

Happy Quilting!

Thursday, December 27, 2012

Starting a New Rag Quilt!

I love rag quilts!  Don't you?

I love them because they are cuddly and warm in the winter.

So, when the Studio Rags to Riches set went on sale I grabbed it.  It arrived this morning and I tore into the box and immediately marked my dies.

Next I pulled out my bags of batting bits.  You know when you you trim a quilt and you have strips of batting left-over that are just too big to throw out?  I have been throwing all of mine into a bag and storing them away.  Well, when my set came I decided to deal with the batting left-overs first to get it out of the way.


I used my dies to cut down the batting scraps into something usable - yey!  There are 3 rag batting dies; the small square, the rectangle and the large square to correspond to the rag dies.  I know have a bin of batting shapes ready to go for my next rag quilt!  Yey!  I love having bins of usable things instead of bags of yuck :-D

Now I know some of you will say - I don't like batting in my rag quilts because it makes them heavy.  I do like batting for a few reasons.  

  1. it stabilizes the blocks and gives them great body.  
  2. I get to use up my batting scraps that would otherwise be thrown out.
  3. it stabilizes the stitches so they don't pop
  4. this is what it looks like outside my quilting studio window right now

Yep.  Snowy and cold!  You can never have a quilt that is too warm for me :-D  Bring on the batting I say!

Do you like rag quilts too?  Do you put batting in them?

Tuesday, December 25, 2012

Merry Christmas!

Merry Christmas everyone!

I hope that your day is filled with love and laughter and joy this holiday season!

I thought that I might share a bit of my "loot" this year.


Of course when my boys and my Mom asked what I wanted for Christmas I said dies!  I picked out a few dies when they were on sale and Voila!  Christmas shopping was done for 3 people :-D

Check them out! 
  • The birds die - too cute to not get.  
  • The holly berry and leave jumbo die will work very nicely with my smaller one and make Christmas appliques a snap!  
  • The small tumbler multiple was too great to pass up (and one I have been wanting for a while now) and it can cut 80 small tumblers in one pass!  I can just see amazing Eye-Spy quilts made with this die!  
  • The large bear die will work really well for instant baby quilts.  I think the bears would be really cute in Minke or a nice flannel - you can even use the circle dies for the belly, nose and eyes. 
  •  The basket die was such a great price and when combined with some of the flower dies would make a nice applique so fast and easy!
People who just start die-cutting often lament at the thought of purchasing all the dies.  Dies make great and really easy gifts!  You would be surprised how quickly you will accumulate dies in a very short time and they are so much more affordable when they go on sale.  Make a wish-list; or, ask for gift cards and you will soon be adding to your collection and you'll be so surprised at how fast it grows!

I got some other quilty stocking stuffers and other great gifts but I just had to share my new dies.  Hmmmm, now to put them to use!

Did you get any quilty gifts this year?  Or dies?  Please feel free to share any pictures on my Facebook page!

So have a very Merry Holiday season everyone and here's to many more days of quilting together!

Sunday, December 16, 2012

Procrastinating!

I have so many things to do!

This time of year I think we all have lots of things to do and yet I find myself trying to avoid doing what I should be doing and doing what I want to do instead!


Yesterday I had my December Go! Club meeting and I featured the various holiday applique dies.  My plan was to make the snow pillow pattern on the Holiday Accessories die - but - with two sick kids at home I ran out of time to do anything more than cut some of the shapes.

When I got home after the meeting I decided to work on the pillow and finish it.  I think it is so cute!  I love the way that it turned out and that it is more wintery rather than just Christmasy.  It will grace my couch for most of the winter I think.

Ok maybe I should do something that I need to get done now - sigh!

Friday, December 14, 2012

Next Step in the Scrappy Christmas QAL

How are you coming along with the QAL?  Any progress?

Let's get those blocks together!

First take your two stacks of squares and set them together - ready to sew.


Because we pressed half of our units to the HST the center seam will butt and it will be easy to sew.   Do not flip anything at this point!  press to one side but make sure you are consistent.


Flip half of the units and pin together to get your intersections and sew the two half blocks together.


Press to one side and Voila!  You have your blocks all ready to go.  Make sure that your chains line up properly in all of your blocks.  It is much easier to correct now rather than once we sew them together - I know this for a fact LOL!

Only two more steps and we are done with the top!

Tuesday, December 11, 2012

Next Step in the QAL!

Ok all!  Let's get going on the other part of the block!

This time you will be putting a dark quarter of the 4-patch against the wide part of the half square triangle (HST).  This is unlike the other sections where the dark part of the 4-patch went to the point.


 Press towards the HST - so that our seams will butt when we put it together.


But the seams in the middle and sew two of these together.  Press towards a side or swirl your seams in the middle.  Notice the chain running through the block?


See how the two different units (last weeks and this weeks) are not identical?  We need to have the chain running through the blocks so that it will all line up at the end.

Try to get contrast between you HST fabric and your squares so that there is some definition.  Try to avoid things like two dark greens together or two reds etc.  This was a bit of a challenge sometimes but if it happens don't sweat too much about it!

So, how is it all coming along?  Are you keeping up?  Or, are you collecting the steps?  Let's here how you are doing!  Also, feel free to share any pictures on the facebook page!

Happy sewing!

Saturday, December 08, 2012

Finished Charity Stockings!

I am so thrilled!

Here they are the finished stockings!


212 finished stockings ready to go to a local charity to give away at Christmas to needy children.

I cut all the fabric on my Studio cutter using the 2 part stocking die and our guild members sewed up the little stockings.  Want to see how we did it?  You can check out my stocking video here.

If you have been following my blog for a while you will have seen my various adventures with these stockings and the fun that I have had with them.  I am so proud of my guild members and of the one individual that donated most of the fabric used in these - thank you - you know who you are ;-)

I would encourage you all to think about giving back in this season where we get so much.  Sometimes the best way to make yourself feel good is to make someone else feel good.

Friday, December 07, 2012

Chisel Swirl Baby Quilt


Hi all!

In preparation for my monthly Go! club at my LQS, this month was the chisel die, I decided to whip together a quick little baby quilt to showcase the how chisel die shapes can make a type of star.  there are many, many different stars that the chisel die can make - this is just one of them.  But, I thought that it worked up nicely into a baby quilt and people wanted a little tut so here it is!


You will need the Go! chisel die and the Go! 3" finished HST die.  You will need to cut 16 red chisels (or your feature fabric) chisels and 16 of your background chisels.

NOTE!  We need all like chisels for this so you cannot fan-fold your fabric!  All the chisels can only be cut either right-side-up or right-side down.  This is extremely important.  You may want to pre-cut rectangles 4" x 10.5" and then layer them all right side up.

You will also need 16 total feature fabric 3" finished HST - you get 4 in one pass with the Go! die.  And 16 of your background fabric HST


Sew the background chisels to the feature fabric HST and the background HST to the feature fabric chisels and press to the feature fabric.


Sew these together in units of two with the feature fabric on the right and the background fabric on the left.  Look kind of odd huh?


Following the block sew first two of the units together and then again so that you have 4 of the units sewn together.  Nice and easy and what a neat spinning star!


Sew 4 of these stars together to create the secondary background star in the center.  I love how the little hour-glass units appear and make the stars look like they are spinning!


I added two borders - one first border cut at 2" and then a second 4.5" border with corner-stones. 

For an extra little embellishment I added rick-rack into the binding as a flap.   I love how cute it is!

What do you think?  Any questions feel free to leave them here!

Sunday, December 02, 2012

Let's Get Started on the Blocks!

Ok everyone it is time to start on the blocks of our Scrappy Christmas QAL!

We are going to be sewing with half of your 4-patch units and half of your HST's.  Last installment we organized our units so we would be ready for today!


Today we are going to take 120 of your 4-patch units and 120 of your HST's, leave the others for next week, and lay them out like in the photo.  We are going to be constructing 1/4 of the block (well really 1/2 but you get the idea).  In this quarter your 4-patch print and the top of the HST will be touching.  So, I tried to arrange it so that I had contrast between the prints.  Red to green or black etc.


Sew them all together and press to the 4-patches.  Hello Mr Grinch!  Flip around half of these.


Sew these together butting the center seam.  I didn't pin here - the seams butted nicely.  Press to one side.

Hello again Mr Grinch!  Isn't that too cute how that worked out with the HST!

That's it for this week!  How is your quilt progressing?  Any questions feel free to leave them here!  You can find the previous installments in the QAL tab.

Wednesday, November 28, 2012

Why Do I Blog?

I was asked an interesting question by a fellow quilting instructor the other day.  I was asked - why do you blog and give everything away for free??

Well, I was so surprised that I gave a really short answer that really doesn't reflect how I actually think so I thought that I might blog on it to clear it all up.

I teach quilting classes and I love to teach them!  Yes, I get paid to teach these classes.  The participants in the classes pay to be there and learn the subject matter.  It is a lot of fun and I get a lot of satisfaction from this.

I also, however, blog about various things and offer tutorials, tips, tricks etc etc.

So, the questions was, in a nutshell, why do I give all this information away for free on my blog?  Why don't I make a class around it and charge for it since I don't make any $$$$$ by blogging about it?

The answer is multi-faceted.

One - I enjoy blogging!!  I LOVE the friends I have made through my blog, from around the world, and the fun we have.  I love meeting new people through my blog.  I have enjoyed support from my readers and given support in return.  I've asked for help on my blog and given help in return.  There is a give and take that makes me very happy and keeps me blogging even after 6 years of it!

I truly think that we need to "pay it forward" in this life and give to the universe to get back.  The more people that find a solution to a problem on a blog - the more people we have quilting in this world.  More quilters = more new products and fabrics and patterns and ideas in the world and that is NEVER a bad thing.

That said, I also use my blog as a reference point to send my students to answer questions that I get alllllll of the time!  Case in point, my mutli-part binding tute.  Instead of demoing corners or sleeves too many times to count I can direct them to my blog - easier for me and way easier for them.  Win win!

Also, who would you rather take a class from; someone generous and giving like Bonnie Hunter or some other, cough cough, less than generous quilters or pattern designers out there who refuse to share what they know and jealously guard their knowledge so that only they know the technique and won't be threatened by some other up and coming quilter out there.  Come on - we've all met or experienced these quilters (luckily I think there are more giving quilters out there than non-giving).  Now ask yourself - do you want to pay to take a class from this person?  For my part - no I don't.  Bonnie Hunter's publishing and teaching job doesn't seem hurt at all for giving it all away - she's booked until 2016!  So, I try to model myself after the teacher that I would like to take classes from.  I often fall short - but I try!

I try to offer inspiration and tips and tricks and just plain knowledge on my blog.  However, I also have always wanted people to see the real me - mistakes and all!  Why?  because I get as much affirmation and support back as I try to give.  I want everyone to see that every quilter has a process and suffers from indecision and makes mistakes.  It's all real.  There are some big name quilters out there who never show their process and I don't find them very inspiring b/c I think (probably mistakenly) that they never have any problems or make any mistakes - where is the learning in that?

Also, purely selfishly I get a lot, and I mean a lot, of information and inspiration from other people's blogs.  Where would any of us be if no one shared?  Um, I wouldn't be die-cutting that's for sure!!  Without the fabric die-cutting blogging community I would probably still be floundering instead of currently teaching and writing about fabric die-cutting.  Without the generous videos put out by people like Ebony Love where would many of us be?  Did Ebony's videos and blog posts stop her from putting out a very successful book on fabric die-cutting?  Nope! Indeed, I would say that because she is so generous her Kickstarter campaign was more successful than she could have imagined.

The more I learn - and share - the more I am inspired by people who have taken what I shared as a jump off point.  And then they share and I learn!

So, wow what a long-winded post, I blog and give lots of information away for free because it makes me happy to be a part of the blogging community that is generous and inspiring and supportive.  We couldn't have that if we didn't all participate!  So, give it away and have fun - next thing you know you will be on to the next thing anyways ;-)

Thank you all for continuing to inspire, create and share your creations!

Any thoughts?

Sunday, November 25, 2012

4-Patch-a-Palooza

Hi all!

How do you like the new look for the blog?  It's a little brighter than my last look ;-)

Ok - time to get sewing again on our Scrappy Christmas QAL!

This week we are making 4-patches!  I know that a couple of you have just purchased your dies but I want to keep posting the steps weekly and you can work at your own pace.  This isn't a race.  It's a QAL that you can work on in your own time.

This week
 

We make the 4-patches!  Quite simply - sew 1 @ 2" background square to 1 @ 2" Christmas print square to make 480 2-patches.  Gulp!  Put on a movie and start your chain-piecing engine!  Press to the dark side.

Next,  sew 2 @ 2-patches together butting the seam in the middle to make 240 @ 4-patch units.  Press to a side.

Whew!

Next


Organize!  Here is how I have organized my units.  
  • 240 @ 3.5" unfinished HST units in the middle.  
  • 120 @ 4-patch units on one side
  • 120 @ 4-patch units on the other side
You will need your 4-patch units divided in half for the next installment so I figured I might as well do this as I was pressing.

Ok quilters - are you keeping up?  If you have any questions or comments please feel free to leave them here.

Need the other installments?  You can find them on the QAL tab on the top bar!

Saturday, November 24, 2012

He Was Right - I Was Wrong!

Yep - you read that correctly!

I found this red NHL print in a bin and I thought - why in the world did I buy that?!!  The I remembered I picked it up at a yard sale thinking to make preemie quilts with it.   That was years ago!  It's not great quality so I thought - just chuck it - and I did.

I have a bin by my Studio cutter and I threw it in.  My husband actually pulled it out and asked me why I was throwing it out.  I said - oh I don't really want it and I'm not going to use it etc etc.  He gave me a strange look and said - um, I bet lots of kids would love to have and NHL stocking!!

D'oh!  What a great idea!  So I found some co-coordinating fabric and cut out 6 stockings.


I have to say - he was right and I was wrong.  I should have never tried to throw the fabric away - those are some great stockings and should make 6 kids happy this Christmas.  I don't know why I didn't think to make stockings from this fabric since I have been cutting so many kits - I guess I just didn't even consider it - but they certainly are cute!

So what do you think?  Was he right?

Monday, November 19, 2012

Black Friday Starts Today!

Hey Quilters!

Just a quick note to share some amazing deals at Accuquilt!  They have started their Black Friday promotions and they look great!

I know that I will be taking advantage of at least one of these deals!  Hello rags to Riches die set :-D

But seriously the Go! and Baby Go! cutter are on sale for a seriously low price - and I know that many of you have been wanting to get one.  This is also a great time to get that special gift for under the tree!


Ok - time to shop!


Sunday, November 18, 2012

Let's Sew!

What do you say?  Is it time to sew yet?

I say yes!

Let's get sewing  for our scrappy Christmas QAL - we'll start with the HST triangles.

You can use any method that you like to make 240 @ 3" finished HST (3.5" unfinished HST) - anything!  You can rotary cut them or die cut them - which ever method you would like.


I chose to die cut mine but use what ever method you would like.  In a nut-shell we need 240 HST.  

So this is the first sewing bite.

Any questions - feel free to leave them here.

Do you need the previous clues please look here.  Or look on the tabs section.

Ready - set - sew!!!

Sunday, November 11, 2012

Scrappy Christmas Quilt-a-Long - cutting

Ok it is time to get started!  Or, maybe you already have started ;-)  I know that a few of you are still waiting for your dies to come in but I thought that I would go ahead and post the cutting directions so that you can get started with your cutting and/or sorting.  Remember this quilt can be die cut or rotary cut.

Let's get to the cutting directions


For my quilt we will be making 30 of this scrappy block - I love the chains that run through it! 

Each block required 16 square cut 2" of the background and 16 squares cut 2" of your Christmas prints.  So, for the entire quilt you will need a total of:
  • 480 squares cut 2" square of your background - this can be scrappy!
  • 480 squares cut 2" square of your Christmas prints - this should be scrappy - again I am sticking to the darker Christmas prints and leaving out the lights.
Each block also has a total of 8 half square triangles (HST).  There are soooooo many different ways to make HST out there (and I went over a few in my last post) so you choose your favorite and cut according to the directions.  I am going to die cut so I needed:
  • 240 @ 3" finished HST (3.5" unfinished) of the background fabric - this can be scrappy
  • 240 @ 3" finished HST (3.5" unfinished) of scrappy Christmas prints
If you are rotary cutting to get your HST you would need to cut squares, drawing the line, and sewing up each side of the line, and cutting in half on the diagonal etc, you would need:
  • 120 squares cut 3 7/8" square of the background fabric - this can be scrappy
  • 120 squares cut 3 7/8" square of the scrappy Christmas prints
To make it easier to find all the posts I have created a tab in my top bar where I will list all of the step - so if you need to find a previous post it will be easier for you.

If you have any questions please feel free to post them here and don't forget to share your progress on my facebook page!

Ok - ready - set - cut!

Thursday, November 08, 2012

Our Scrappy Christmas Quilt!

Here it is!

What do you think?!


I love the way that this quilt looks so much more complicated than it is!  And the secondary stars really pop out once you see the blocks together.

This quilt is a 5 x 6 set and will finish at about 60" x 72" so it would be very easy to make it smaller or larger by adding or taking away blocks - you can choose. 

Are you in for our scrappy Christmas quilt-a-long?  You can see my previous post for the start-up details.  Let's get going and use up lots of scraps!

Wednesday, November 07, 2012

Scrappy Christmas Quilt-A-Long! Week 1

Ok who is in!???

I had an idea for a scrappy Christmas quilt that I think is going to be beautiful - and - use up lots and lots of scraps!  What could be better?

I thought that we might do this in the quilt-a-long style where anyone that wants to work along side me can so that at the end you will have a lovely scrappy top in time for Christmas.  I have planned this to be approximately 60 " x 72" but you could easily make this larger or smaller depending on the amount of blocks you want.

What do you think?  Sound interesting?

If so let's get going!

Scrappy Christmas Quilt-A-Long - Week 1

 Getting our supplies together!

First let's assemble what we need.  You can rotary cut this or die cut this.  If you are die-cutting this can be cut on the Go!  Baby Go! and Studio machines as well as Sizzix but I couldn't seem to find the Sizzix dies to match what I wanted so you can use Go! or Studio dies instead.


Die Cutting - you will need the 2" square die (Go! 55022, Studio 50602) - or an alternate version) and you will need the 3" finished HST die (Go! 55009, Studio 50163).  You only need 2 dies for this entire quilt!  Yey!

Rotary cutting - you will need the ability to cut lots and lots of 2" squares ;-)  Hehe you know how I love them!  And, you will need to pick your favorite method to make 3.5" unfinished half square triangles (HST) or 3" finished HST.  You can use your Eleanor Burns Triangle Square Up ruler or the Fons and Porter ruler or Thangles - you choose your method and you will be following the directions for the method that you are using - if you are confused by this please let me know and I will try to clarify - basically pick your favorite method and use it ;-)

Fabrics
  • Lots and Lots of Christmas scraps!!!  I am sticking to the darker Christmas prints: reds, greens, dark golds, blacks etc.  I want contrast between my background colours and my foreground.  So I am not using lighter beige or golds - just set them aside for a future project.  Think contrast ;-)   Some of these we will be cutting into 2" squares and some into our HST.
  • approximately 3 meters/yards of an off white or cream colour - this can be a mix of prints or all one - I have used one solid off-white.  Again, some will be cut into 2" squares and some into HST.
  • thread that will blend - I am piecing in an off-white for this project
If you want to get a bit ahead you can start cutting your 2" squares and HST prep.  I will let you know in a bit how many of each you will need.  Remember, this project is to help us use up our scraps so there are going to be lots of pieces!

If you don't want to do Christmas prints you can do a purely scrappy quilt and that will work nicely as well - me I want a Christmas scrappy quilt!

I will give you a bit of time to acquire your supplies - ie get your dies or your background fabric - and then we will proceed to the next step - cutting!

Any questions please leave them here!  Also, please leave me a comment and let me know if you are participating - and I hope that you are!!  You can also share your fabrics on my facebook page http://www.facebook.come/SunshowerQuilts

Happy sorting!


Sunday, November 04, 2012

Making Kits!

Hi all!

Ahhh fall!  And, my quilting classes are in full swing and busy.  It's so much fun to have busy classes with fun people in them!  One thing I know from past experience is that I have to stay well on top of my class prep work or I will be frantic the night before I teach - and sometimes I teach 3-4 classes in a weekend!  So, I don't like to fall behind at all.

This weekend (coming) I teach the first of a 3 part Crazy Shortcut Quilts (CSCQ) class.  I have been teaching this class for about 3 years now and it is always fun!  You can see my very first CSCQ here.

I make a little practice kit for every student to take home after the class so that they always have a physical reference to go back to to remember the quilt as you go method from the book.  These little quilt samples take quite a bit of time to prepare as there is cutting and sewing and quilting involved with EACH one!  I love the looks on their faces when they get them though - it's so worth it!

3 years ago I did A LOT of prep for this - I mean A LOT!  Enough prep that I had little samples to give away for three years - and I taught a lot of people!  My sample stack was over 2 feet high!  But, I didn't finish it all - only a lot of it LOL - so I had some unfinished work that I could pick up and finish to make more samples - since I finally ran out.  There were a lot of the little pieced tops and even some battings, backings and sashings cut and prepped.

I spent time today making samples to get ready - and I decided to just finish up everything I had started so that I could have samples for more classes already complete.  But, of course, I looked for a way to stream-line it ;-)


After layering and quilting, each of the little quilt sandwiches gets squared up to 5" (for the samples) - and I thought - hmmm I have a 5" square die - I wonder . . . . .

 
I placed the little quilts on the die - these are all quilted with batting and backing - and ran it through my Studio cutter - the Studio can take up to 10 layers so the little quilts were under that.


I removed the excess and voila!  Perfect little quilts ready to kit up - and I didn't have to square them up with a ruler!  So much faster!


I bundles these into groups of two with the sashing and I am ready to go for 3 - 4 more classes!

I love finding new ways to use what I have to stream-line production like this - yey!

So what did you do with your extra daylight saving hour today?

Monday, October 29, 2012

Candy Corn is Complete!

Hi all!

I was so determined to get my Candy Corn Quilt finished before Halloween that I worked on it a lot!  You can see a short tutorial on the construction of this quilt here.


I also had my Go! Club on Saturday, and I was featuring the Tumbler dies so I really wanted to share this with the group.  So, to prevent myself from just showing the top - I loaded it onto my frame.

 
This is how my brain works LOL - I'd rather quilt it then load it again ;-)


I had this perfect 40 weight YLI variegated thread that I used for the middle - top and bobbin.  The spirals in the fabric became my inspiration for the quilting design.


I quilted the middle in an all-over spiral pattern and I quilted spider webs in the borders in a dark grey thread.  You can't really see the quilting in the borders all that well but it adds great texture - I hope that you can see the quilting!


I decided to use some left-over Halloween prints on the backs.  The two main prints have been borders and backs on a couple quilts so it seemed great to use them up on the back of this quilt!  A girl only needs so much Halloween yardage before you HAVE to do something or other with it! Anyways I like the effect of the fabrics on the back and it makes me feel good to use the stash.

I was able to show this at my Go! Club the morning after I finished it and everyone seemed to like it - yey!

So what do you think - are you going to make a Candy Corn quilt?  Or, maybe a table-runner?

Want to do me a favor?  I entered a Halloween quilt contest over at the Warm Company Facebook page and you can easily vote for my quilt by clicking on this picture http://www.facebook.com/photo.php?fbid=10151081917272385&set=o.261044530611534&type=1&theater and click like for me!!!   It will only take a second - I promise!

Thursday, October 25, 2012

The Big Little Book of Fabric Die Cutting Blog Tour!

It's finally my day!

I am so excited to be a part of the blog tour for The Big Little Book of Fabric Die Cutting Tips, by Ebony Love, and today is finally my day on the tour!


Why am I so excited?  Because, frankly, we need this book.   It is not another project book - this is an information book!

When I first started even looking at fabric die cutting there was next to NO information out there other than the Accuquilt site itself - and, at that time, there was next to nothing on that site except a basically a catalog of the dies themselves and the two cutters - the Studio and the Go!  As a person interested in purchasing a die cutter I had to really search for information - I had to really try to find information.  I searched YouTube and blogs trying to find reviews and videos and it took a lot of effort.  I finally purchased my Go! from a local quilt shop and dived into die-cutting.  I made a lot of mistakes in the beginning.  I didn't pay attention to grain, I bought dies I still haven't used because I bought what I thought I would use and not what I actually would use.  I thought that I would use the machine primarily for applique - nope!  I use it primarily for piecing - funny huh?  I bought dies that I knew I would use and love (the tumbler, the rag die etc) as well; but, if The Big Little Book of Fabric Die Cutting Tips had been around when I was first purchasing I probably wouldn't have made these mistakes.  The section on which dies to buy is very honest and very helpful.

The Big Little Book of Fabric Die Cutting Tips contains a die-cutter comparison that is very frank and honest and not exclusive to one company.  Ebony focuses on Accuquilt and Sizzix since they are, currently, the two companies that have the most to offer for quilters.  I really like the open discussion of the merits of each brand and which brand and cutter would suit different quilters.  Let's face it - each quilter has a different situation and different needs.  Your quilting set-up, budget and needs will affect your decision as to which cutter to purchase.  Would Ebony's book have helped me here?  You betcha!  Honestly, I still would have made the same choice that I did - but - I wouldn't have waffled for months before I made it and I wouldn't have worried so much about making it.

As I read, The Big Little Book of Fabric Die Cutting Tips, I found myself nodding my head in agreement with many of Ebony's statements - especially her take on the strip cutters.  I laughed out-load when I read her statement that many quilters point to the strip cutters and say what a waste of money they are and that they can cut strips faster with a rotary cutter.  When I first purchased my Go! I was guilty of this myself!  Yes, I admit it, I said this myself.  Guess what?  I was completely wrong!  Strip cutters are so much more than strip cutters and are some of the very BEST and most necessary dies to get!  There is a reason there is a whole chapter devoted to them in the book - they are workhorse dies!

There are lots of great chapters in the book including storage, maintenance, applique, fabric preparation, the rag dies and piecing - just to name a few.  These sections are an indispensable resource for those people wanting to get the most out of their die-cutters!  The information has been compiled, by Ebony, based on experience and by other leaders in the fabric die-cutting community.  Basically with this book you will have the most common questions answered and more - this will save you the hours that I had to spend researching when I first started die-cutting.

Ebony also has a big section on her EDeN system.  I'm not going to re-invent the wheel here though - Marjorie at Marjorie's Quilting Bee has already done a fantastic review of this system that I know you'll want to check out!

You will want to check out the other stops along this tour!

Other book tour stops this month:

If you're on the fence about purchasing a die-cutting system or someone who has a die-cutting system and wants to learn more about it - this is the book for you.

And, if you want to know if you will use your fabric die-cutting system I wouldn't hesitate to say yes!!!  I love my system even more than I ever thought that I would and I love cutting projects i never thought that I would ever make easily.  I also absolutely love processing my scraps soooo fast and easily so that I can actually use my scraps and my stash to make projects - so in fact - die cutting fabric saves me $$$ ;-)


2022 Christmas T-Shirt Quilt Gift

As promised - here is the T-Shirt Quilt Christmas Gift from 2022! I did share this on my Facebook page but not on my blog, (whoops sorry!) s...