Wednesday, November 27, 2013

Waste

Hi all!

One of the MOST frequent questions I get asked is about the waste created by fabric die-cutting.  There is a huge misconception that die-cutting is very wasteful.  And that is simply not so.  I frequently tell people that "blaming your die-cutter for wasting fabric is like blaming your rotary cutter for wasting fabric."   We wouldn't blame our rotary cutters for waste would we?  Nope - we would call it user error.

So, since I am currently working on the Downton Abbey mystery QAL I thought that I would share the fabric waste generated from die-cutting the first 20 blocks in the mystery.  Aside - aren't the fabrics yummy!?


There are 2 of the three blocks all pieced together with the second colour-way all cut.  20 blocks all together and at the bottom left is the little bit of waste and it is mostly selvages!!


Sorry this shot is a little blurry (but I don't want to re-take it because I want to get sewing!) but can you see the little tiny bits in my hand?  The larger bits are mostly selvages.  Keep in mind as well that none of my HSTs (half square triangles) needed to be squared up after sewing - I just got to sew them together and I was done - yey!

As an aside I used 3 never used dies and/or new in these first blocks!  Yey!!

So, what do you think?  Were those little strings of waste acceptable for 20 blocks worth of piecing?  Or, was that too much?

Saturday, November 23, 2013

Squaring Up With Your Die-Cutter

Hi all!

I was doing a little squaring up today of some of my leaders and enders 16-patches and using my die-cutter to do it; so, I thought that it might be a nice little tutorial to show you how I quickly and easily square up these blocks, not with a rotary cutter and ruler, but, with my 6.5" square die instead.

When I am doing my leaders and enders projects my 16-patches come out to 6.5" square but usually need a touch of squaring up here and there.  Once I got the 6.5" square die I wanted to use it to square these up instead of my rotary cutter - I mean who wouldn't!?


Lay the 16-patch (or 9-patch or whatever you are making) across the die and take a second to line it up so that it will trim properly.  Because of the seam allowances this is instantly 3 layers so the maximum you can layer on the Go! is two 16-patches and on the Studio is three.


Put the mat on top and run it through!  Voila!  the little bits come off and you are left with a perfect square in just a couple seconds and one pass instead of all the lining up of the ruler, rotary cutting and flipping.  Easy - and I like easy.

We often think about using our die cutters to cut out but why not use it to square up too?  have you ever done this before?  I know that this might be old-hat to a lot of you but to a few of you thins might be a new idea for using your die cutters!

Are you doing any Saturday quilting tonight?

Monday, November 11, 2013

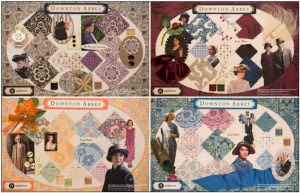
Downton Abbey Quilt Along!!!

Hi all!

I am so excited because I have chosen to participate in Ebony Love's Downton Abbey Quilt Along!!  What is this you ask?  Well you can follow the pretty picture link to find out!


After registering to participate I was sent a fabric requirement list and a die and/or rotary cutting instructions.   I am going to die cut mine so I ordered the last couple dies that I needed to be able to die cut completely - yey!

In the process of determining which dies I needed I decided to pull out the dies needed from the list.  And here they are - minus the 3 I just ordered (although the 2.5" square die I really didn't need since I have the 2.5" strip die, but, hey, it was on sale!


Wow, that's a lot of dies!  And look at the top!  There are two dies that were on the list that I haven't even unpackaged yet but already own!  That is awesome!  Thanks Ebony for giving me a reason to unwrap those bad boys :-)  Along the right are all strip dies.  There was one more strip die that I could have purchased - the 5" strip die - but since this isn't a strip size I seem to use very much I am going to rotary cut the outer border.

Once you register you will be given a link to the fabric and die list.  Don't have a cutter?  No worries!  There is also a rotary cutting chart as well as charts for Sizzix, Go! and Studio cutters on Ebony's EDeN chart - so everyone can participate no matter how you quilt.

There is also a list of participating quilt shops where you can order the actual Downton Abbey fabric kits from!  The fabric is by Andover Fabric so you know that it will be wonderful.

http://www.lovebugstudios.com/downtonabbey/

So, if you love Downton Abbey and you love Quilt Alongs I hope that you will pop over to Lovebug Studios and check it all out!  I will be posting my progress but not giving any actual requirements or directions on my page so you will have to go and register yourself if you want to quilt along.

So, who is in!!  Anyone want to sew with me?


Sunday, November 03, 2013

Sunday Quilting

Hi all!

Today I decided to get a few things done since I didn't have any set plans for the day - ahhh I love days like this!

I pulled out this super cute green Halloween fabric and almost couldn't cut it!


But, cut it I did to add this flashy first border.


I teach a monthly Accuquilt Go! Club where I feature a die or so every month.  This weekend I featured the Go! Signature die since most people don't know what this die can do!  Beyond the traditional signature block where people sign the rectangle this die can do a lot more things - so I decided to play with it a bit and I came up with this little Halloween table-topper. 

You will need the Signature die and the 3" Finished HST die to make the block.

I love how the black emulates the feel of the bats in the purple fabric.  And, I love the illusion of stretched stars across the quilt. 


After deciding on the borders for my fall log-cabin quilt I wanted to get the top completed; so, I cut the borders at 6.5" and sewed them onto the top and NOW I am happy with the size finally!  It fits on the bed with a much nicer over-hang and will now be a functional bed quilt instead of a throw.  I also like the way that the black gives some negative space to the quilt (which was quite busy with all that orange!).

Unfortunately these two projects will have to stay as tops for the next while as I have a couple other projects that I NEED to get to next.  Ok second really because I have a really quick little project that I would like to do next ;-)  Seriously quick and little project LOL!


Saturday, November 02, 2013

I Finally Decided!

I finally decided on the borders!

After much deliberation and waffling and humming and hawing I finally decided on borders for my Halloween log cabin :-)  Yes, yes, I know that it is after Halloween - so from now on this will be a fall log cabin ;-)

I have already changed my mind about this quilt at least three big times.  I had a size in mind and decided that I didn't like it - so I made it bigger.  Then I still didn't like the size so I wanted it bigger again - and I was going to piece the border; but, I couldn't decide how to piece it because I kept changing my mind.


Well, today I was in a LQS teaching a class and I saw this fabric (it is already in the blacks a bit) and it all fell into place - why not just add a border - nothing fancy - just a border?  The quilt is already busy enough and it doesn't need more craziness.  So I bought enough of this funky black and grey print to add 6.5" straight borders to the quilt.   The print is darker in reality and really fun.

Sometimes I over-think things!  K.I.S.S.!!!!!

What do you think?  Is the simple solution the best one here?

2022 Christmas T-Shirt Quilt Gift

As promised - here is the T-Shirt Quilt Christmas Gift from 2022! I did share this on my Facebook page but not on my blog, (whoops sorry!) s...