Here is the blog on double-fold french binding finally! It's a long one so maybe get a cup of tea or a glass of wine :) I hope that you enjoy it.
I make my binding from cross-grain or length-wise-grain strips unless I need bias strips for rounded edges. I really like length-wise-grain since it is so strong and have very little bend to it.
 I usually cut my binding strips 2.5” for large quilts and 2” for small wall-hangings. I find that I don't like the look of a really thick binding on a small wall-hanging.
I join my binding strips on the bias by putting the two strips right-sides together like the picture and sewing them on the diagonal. You can draw a line if you wish Do this until all the strips are joined. Trim the excess fabric off so that you have just a ¼” seam allowance left.
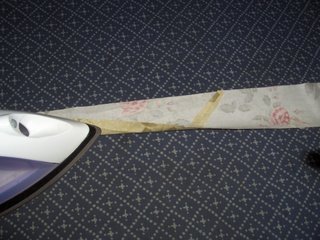 Take your binding to your ironing board and press the seams OPEN to distribute the bulk of the seam-allowance. And, press the binding in half lengthwise so that the wrong sides are together. I generally press the seams open as I go along pressing the binding in half. By pressing your binding in half now you will get a smoother crease in the end and save time while you are machine sewing it on.
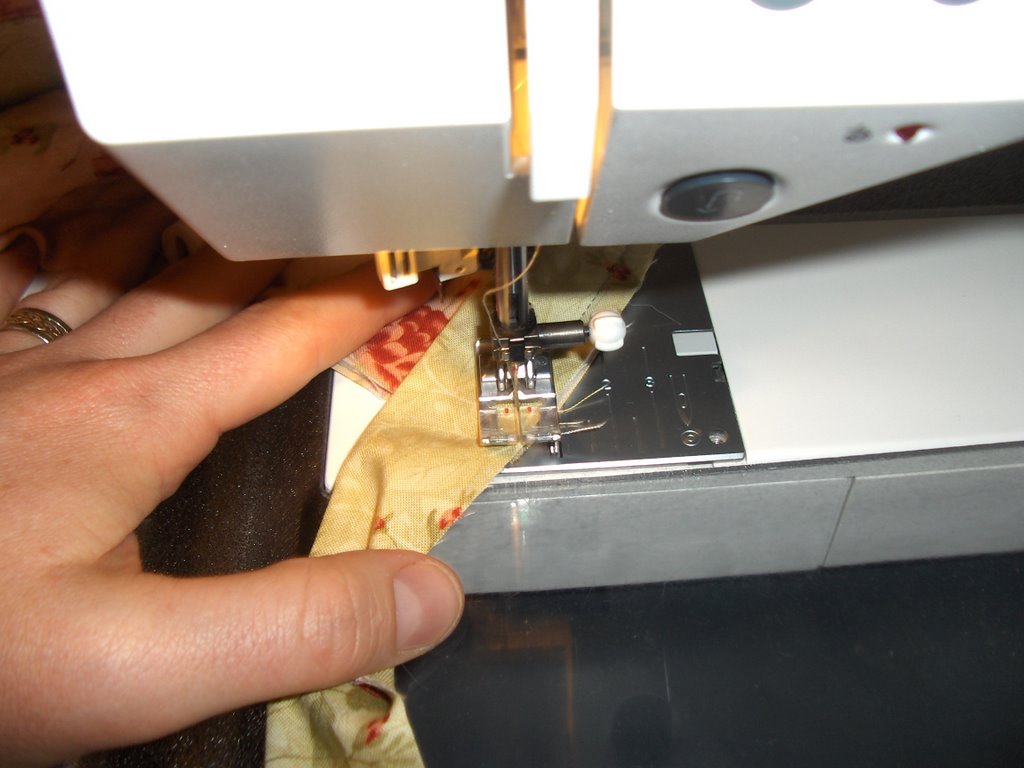
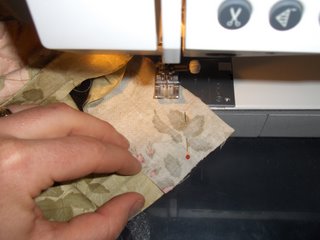
Now take your binding and quilt to your sewing machine now and make sure that you have your walking foot on. Start on one of the long sides of your quilt and make sure that you leave a long tail of extra binding so that we can join it latter. Sew your binding on with the correct seam allowance:
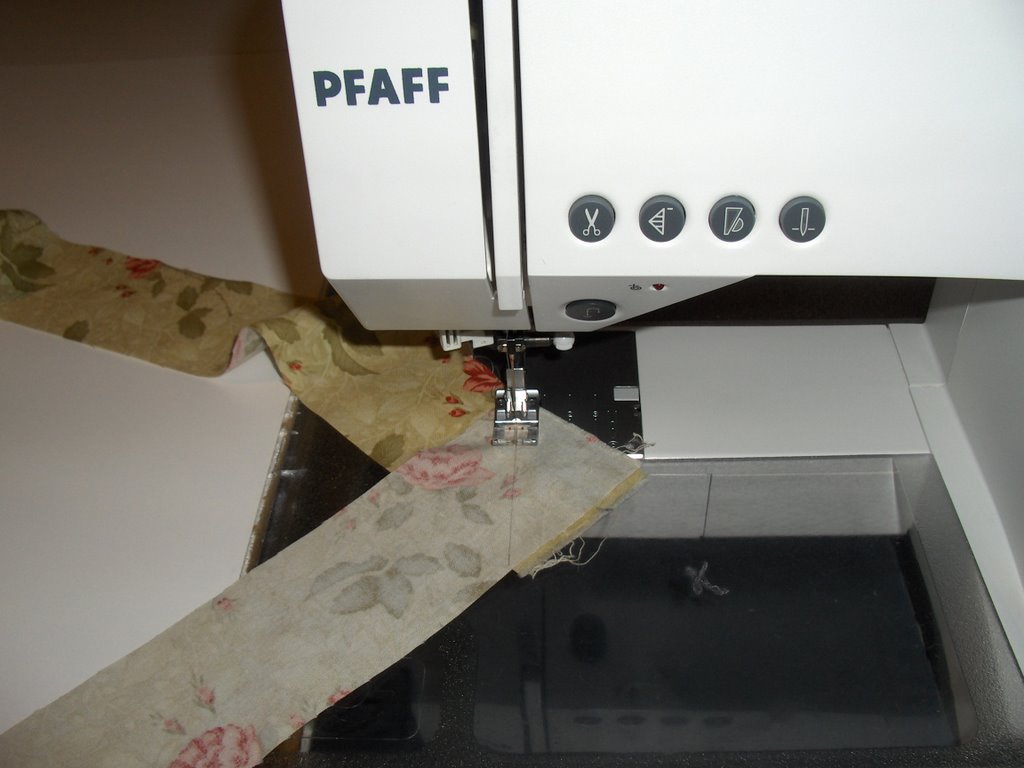
If you sew a 2 ½” binding on at ¼” your binding will either not be “full” when you turn it to the back; or, the binding on the back will be much larger than the binding on the front. You may need to measure this on your machine to make sure that you get the correct measurement. The edge of my O/A foot on my Pfaff machine is a very accurate 3/8” so it is perfect for 2 ½” bindings. After sewing for a few inches turn the binding to the back of the quilt to audition it and make sure that you are sewing it on with the correct seam allowance. Sometimes if you are using thick fabric and thick batting you may have to make this allowance smaller.
 When you get to a corner stop about ¼” before it and pivot the quilt so that you can sew directly into the corner. If you sew into the corner your binding will be stronger and it is easier to fold the fabric in the next step. Remove the quilt from the machine and cut your thread.
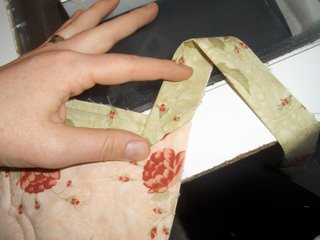 Fold the fabric directly up so that the raw edges of the binding are in line with your quilt edge and the binding is extending beyond the quilt. Make a good crease in the fabric with your finger-nail.
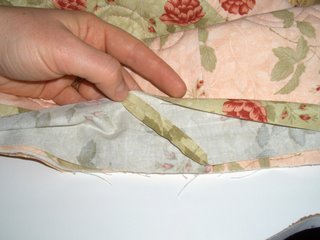
 Next fold the binding straight down. This will form the miter when we fold the binding to the back. This step is so important! Many people just pivot around the corner of the quilt and then not know why they don't get a nice finish in the corners. Take the extra couple of seconds to miter your corners properly. You won't regret it.
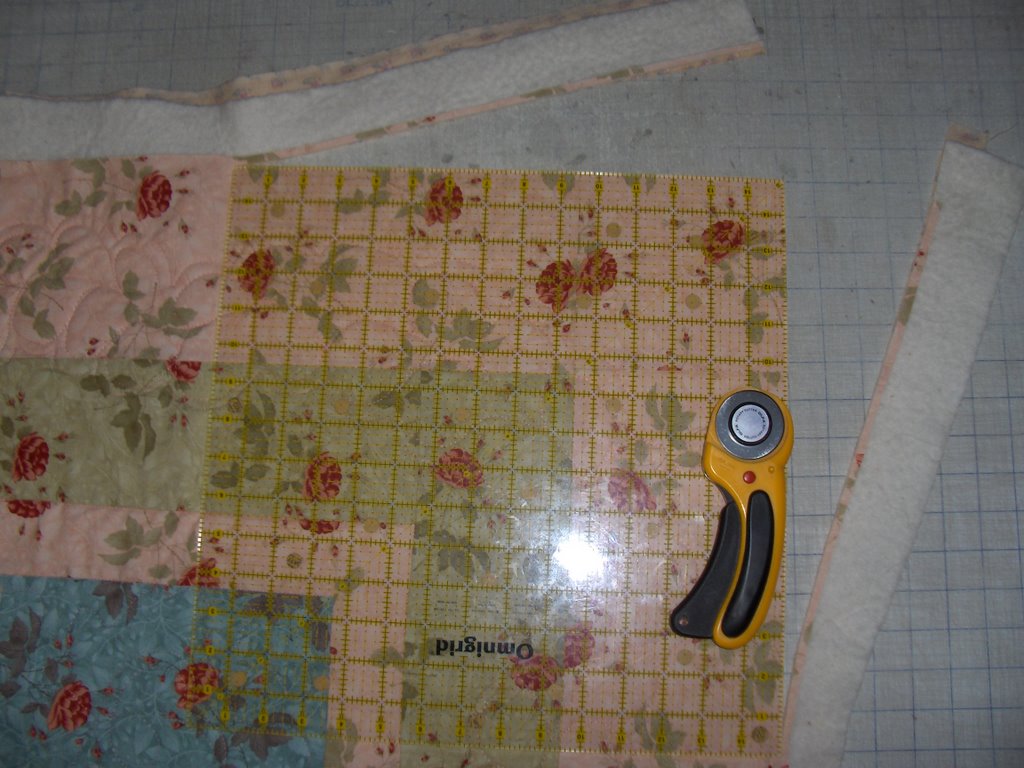
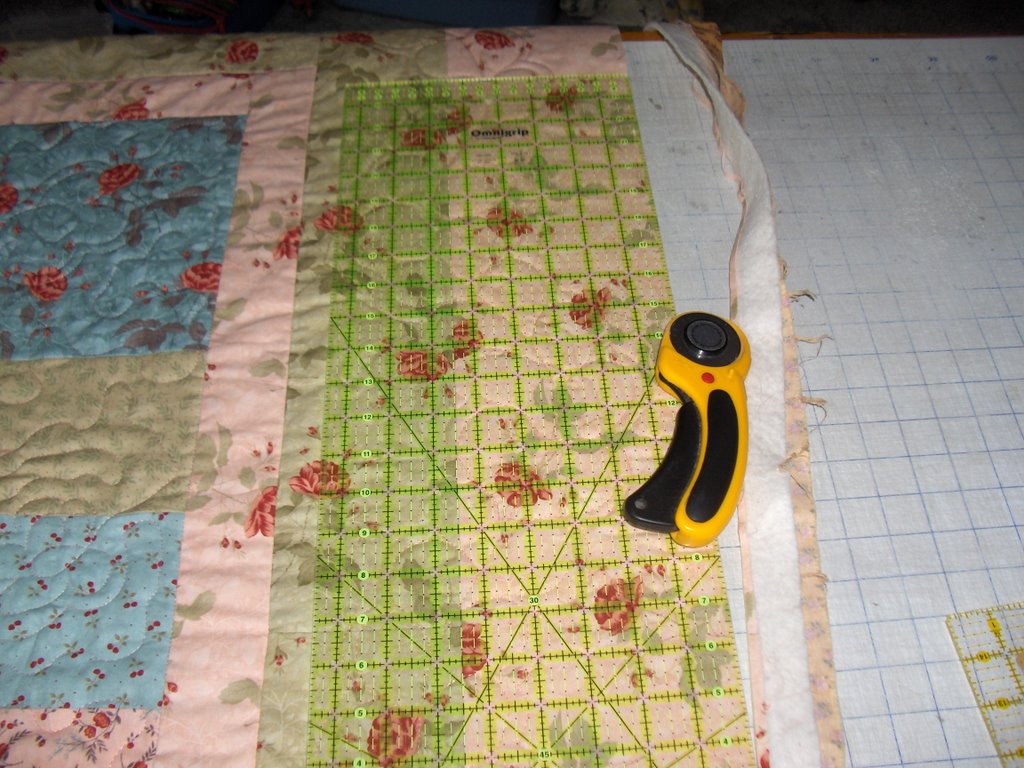
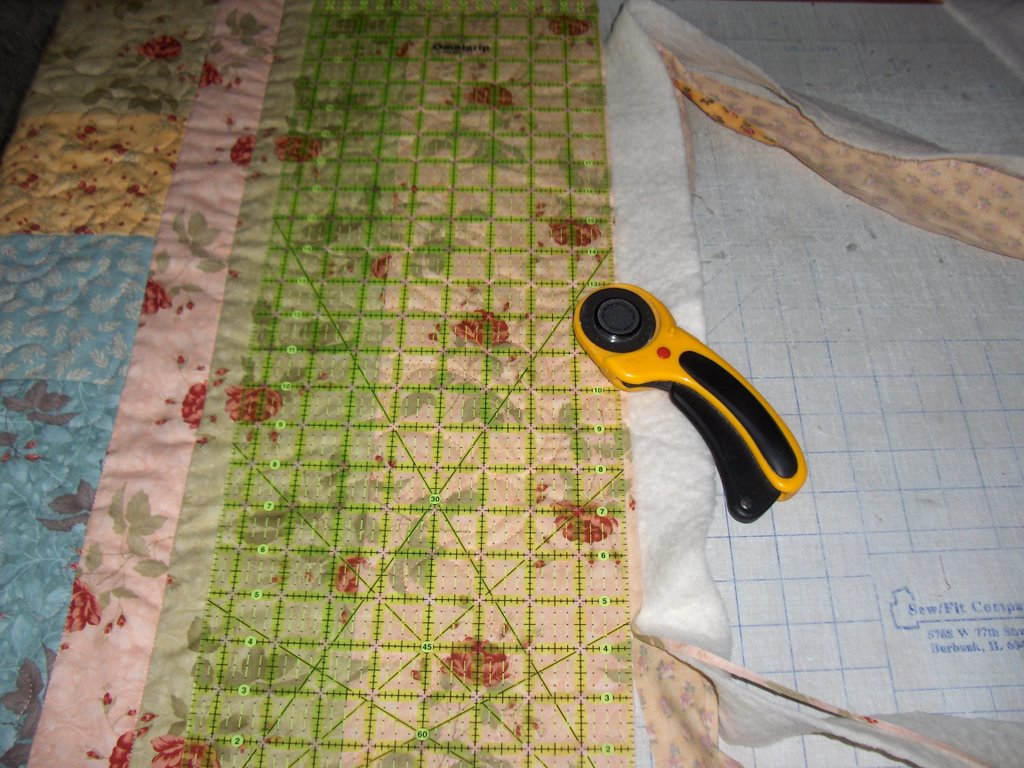
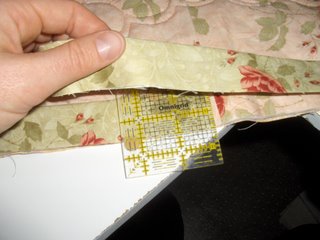 Finish the remaining three corners. You will then return to where you started. Stop sewing about 12” before you get to the starting place and take the quilt off the sewing machine. You will have two long tails one at either end. What we are going to do now is join the ends so that we have a seamless finish. You need to overlap the binding ends by whatever your binding is cut at. IE if you cut your binding at 2” overlap the two ends by 2”. I love this little Omingrid 2 ½” square for binding because it is easy to get between the two ends (much easier than a 6” ruler since sometimes you don't have that much space).
 Cut off the excess fabric. Notice how the 2 1/2" ruler is just perfect for this job and makes seeing where to cut so much easier. We are now going to sew the strips together just like in the beginning when we made the binding.

Put the ends together at right angels just like we did when we first made the binding. I like to use a pin here to hold the ends together in the right spot since it is a little challenging to hold the ends together sometimes. You may have to bunch up the quilt a bit.
 Take the quilt and binding to the sewing machine and sew a diagonal line just like in the beginning. Now let the binding go and make sure that you haven't twisted the binding before sewing or done weird things BEFORE you cut off the seam allowance. The first couple of times you do this you may need to rip this seam out and try again since twisting the fabric or sewing in the wrong place is very common and easy to do.
 Cut off the excess fabric. Press the seam open to distribute the bulk. And, it should look just like the rest of your binding. Continue to sew on that last little bit of binding and your finished! This way of ending your binding takes a bit of practice but it gives a seamless finish without any lumps and bumps.
I hope that you enjoyed this blog and I hope that I was able to make sense :)
If you have any comments of suggestions please feel free to comment here and I will try to answer your questions.
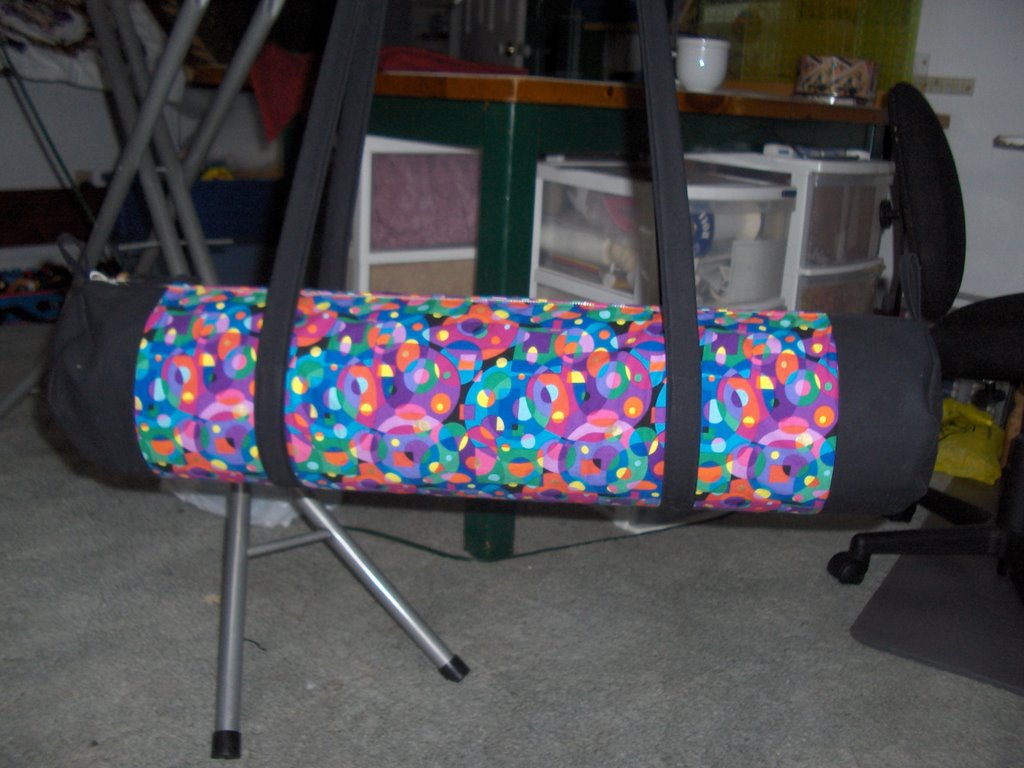 Here is my latest yoga matt bag. I really love this one. It has two straps and a zipper. My last bag was just a bit too small for the thick pilates matt that I have. It was really hard to get my thick matt in and out of the bag; however, I have a thin yoga matt and it is fine in the other bag.