 I hope that you all like the sweatshirt jacket post?? If you have any questions or comments about it please feel free to post them here and I will try to answer them.
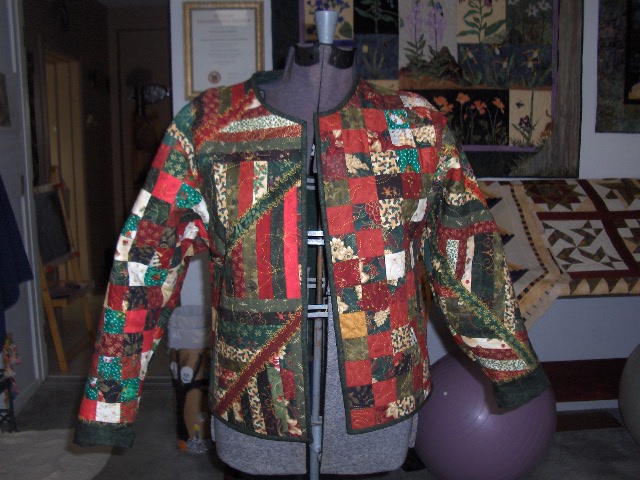
Here are a couple of pictures of the finished jacket with the binding turned to the back. I really like the way that this jacket fits and it is so cozy and warm. Perfect for wearing around the house over Christmas and New Years. I love that you can throw these jackets on with jeans or with nice dressy pants.
 Here is the back of the jacket. I combined the elements from both sides of the front and the sleeves on the back of the jacket in strips. I think that it is neat how the back looks like I have a sash on. The decorative stitches olong the sashing strips really blurs the lines of the strips so that they seem a little more integrated into the jacket body.
I cut the sleeves too short so I had to add cuffs onto the sleeves to increase the length of them by a couple of inches. It was actually easier to add a cuff than add the binding :) To make the cuff I just figured out how much longer I wanted the sleeves added a 1/4" for seam allowance and added and inch so that I could turn them up. Then I doubled this measurement so that I could make the sleeves lined. To figure out the width that I would need I measured the jacket sleeve already sewn and added 1/2" for seam allowance. My Pieces ended up being 7.5" x 10 3/4". I cut this and sewed the two 7.5" sides together right sides together. You now have a tube. Turn it right side out and press. Fold the tube back in on itself with the wrong sides together so that you still have a tube with the two 10 3/4" raw edges together. Sew this onto the end of the sleeve and press. Voila you have a cuff that you can turn up. You could also line this with some batting and quilt it if you desired. I did it this way so that I wouldn't have any raw edges showing when I turned up the cuff.
If any of this isn't clear please let me know and I will try to fix it up a bit.


4 comments:
Thank you so much, Katrina, for the jacket tutorial! Your jacket is beautiful! I can't wait til after Thanksgiving so I can give it a try too. :D Happy Thanksgiving!
Your jacket turned out great. I want to make one now. My only problem is that I might have to make at least 8 because there are so many girls in my family that would want one. Hmmm...
Katrina, this is just lovely! Thanks for sharing.
That looks great! I like that it's scrappy, but it also has definite lines to it. The diagonals really add something to the design.
Post a Comment