Tuesday, December 31, 2013

Fall Logs

Hi all!

On this the last day of 2013 I thought that I would share another almost finish.  I played with my new Babtist Fan  Loricles boards last night and completed the quilting on my Fall Log Cabin quilt.  This quilt was so easy to quilt since it was so flat; and, I would love to take all the credit but I have to credit the fact that this quilt was almost entirely die-cut and it is just so much easier to piece when the cutting is correct - funny that LOL!


I am quite happy with how it turned out and I love the texture the Baptist Fan quilting adds.  Since this will be a bed quilt I didn't want to add too much quilting to it which would stiffen it up.  Too bad it's not fall any longer or this would be going on the bed ASAP!


Here's a close-up of the quilting.  I finally got the spacing down by the end of the quilt and I know that this template will be used and used and used by me :-) 

I used 40 weight FilTec Glide thread top and bobbin in Warm Grey.  In retrospect I think a shade of darker grey thread would have been a better choice but hey!  This is a scrap quilt destined for the bed and not a show and done is better than perfect, right?


I pulled this beautiful batik wide-back out of my stash and I think it is a perfect fall-looking backing for this quilt.  I was also able to pull a Warm and Natural batting from my stash and it worked perfectly for this quilt.  I love it when I can pull from my stash :-)

Happy New Years Eve everyone!

Sunday, December 29, 2013

Playing!

Hi all!

Last night I decided to play a bit with my swirls Loricle board and I have to say that I love the effect!


I pieced this baby quilt top ages ago but I could never decide how to quilt it.  I wanted to play with my strip dies but I didn't want to commit to a full quilt so I made a baby quilt top with no clear destination.  Since the piecing is so simple I didn't want to overwhelm the quilt with too much quilting and make a baby quilt stiff.  The Swirls template seemed like a great choice.  I love the texture it creates and I think I will enjoy using it.   I hope that you can see it in the picture?  What do you think?


Saturday, December 28, 2013

Even More Scrap Quilting

Hi all!

I am seriously on a roll using up scraps lately and it really makes me happy :-) Maybe 2014 will be the year of de-stashing and using up for me.  Wishful thinking probably but I can always dream right?

I have been making great progress with my Scrappy Trips quilt blocks and it has made a serious impact on my 2.5" strip bin.  I am pretty happy with the way that it has been turning out.


What do you think?  I think it will make a great bed quilt that can get used and washed a million times.

I also plan on doing the Planet Patchwork New Years Day Mystery Quilt.  I did this a couple of years ago and really enjoyed it.  If you haven't heard of it before the clues are released every couple of hours and you sew along with them and by the end of New Years Day you have a quilt top!  This year the pattern is scrappy so I jumped at doing this one as well.  Here is the link if you're interested in sewing along with me :-D

The pattern is written for rotary cutting but I converted it to die-cutting.  The top required just 3 dies: the 2.5" square die, the 2" finished HST die and the 6" finished HST die if you're interested in die cutting the mystery quilt too.  I was absolutely thrilled that I was able to use even more of the strips in my 2.5" strip bin and some random large pieces of fabric for the larger HST.


Everything is sorted and ready to go for New Years Day!!

I also made another purchase for my quilting frame.  I have tried to do pantographs; but, frankly, they aren't very fun and every little slip means frog-stitching - yuck!  i really wanted to be able to do some patterns like Baptist Fans without marking (because I don't like marking).  So, I did some research and found the Circle Lord grooved board templates.  They were an affordable way to do all-over designs without splurging for robotics.


They sit on the back of the machine, on the pantograph shelf, and a stylus drops down into the groove.  I played with it yesterday and I really liked the way that it made these patterns easy and without marking.  Since I am making so many scrap quilts lately I wanted to be able to quilt them in an overall design that would enhance the quilt without making it too busy.  I also wanted the ability to quilt these utility quilts quickly and easily without spending a million hours custom quilting them.  I chose 2 boards the Fan Clam (in the picture) since it has two different designs on one board and Swirls since it is so functional.  Now I can get quilting a couple of my scrap quilt tops that are sitting in my quilting closet.  I plan on using the Baptist Fans on my fall log cabin and maybe Swirls on my leaders and enders project.  So, what do you think?

Are you making any scrap projects this year?


Thursday, December 26, 2013

Minecraft Skeleton Rag Quilt - A Christmas Present

Merry Christmas everyone!

I hope that you all had a great holiday filled with family and love.  We had a wonderful holiday here with my Mother up and my Father in Law coming up in a couple of days.

I promised my oldest his own Minecraft rag quilt some time ago; but, finding the fabrics was a bit challenging since he was so very particular about exactly what fabrics he wanted.  Since I have made 3 different Minecraft Creeper quilts now I figured a skeleton wouldn't be a problem.

After I got all the fabrics:  3 shades of grey, 3 shades of white (yes really 3 different shades of white!) and two shades of black - easier said then done, I got to work on the quilt and set a goal to get it done for Christmas.  Christmas day came and we opened presents and the quilt was still not finished - it just needed the blocks and rows sewn together.

Christmas afternoon came and I said to myself - get it done Katrina!  So I set to work.


I sewed all afternoon and finally finished it.  Into the washer and drier it went and it was on his bed for bed-time.  I met my goal!

Today when his Grandmother asked him what his favorite gift was he said - my Minecraft skeleton quilt.  Ahhh!  I melted and knew that all the Christmas day sewing was absolutely worth it so that he could get a gift just from me for him - especially one that I promised him so long ago!

I actually like this quilt too - it's one of those "so ugly it's cute" sort of deals.

You might be wondering about the layout - this layout is not of my choosing - I let my oldest layout the blocks exactly like he wanted them.  He was very specific about how he wanted it and since this was his quilt I let him LOL!  I would have mixed up the blocks but he told me in no uncertain terms that mixing them up was NOT correct shading and would NOT create the right texture.  Ok, ok I said!  What's a Mother to do LOL!?

I have now made 4 Minecraft rag quilts!  Can you believe that LOL!

So, what about you?  Any Christmas sewing?

Sunday, December 22, 2013

More Scrap Quilting

Hi all!

Every year I like to decide on how I will deal with the old to bring in the new!  Fabric that is.  I always seem to have this grand idea that IF I deal with all my scraps and stash that I will feel that I can bring in all new fabrics - ya right, I know.  My scraps seem to multiply over night - sigh.

Well, in the interest of dealing with  my scraps I have decided on a couple more scrap patterns that I will be working on over the next little while.  One I posted about yesterday - my Scrappy Trip Around the World.  I made 10 blocks yesterday to see how I like it overall and I really do!  What do you think?


I think this one is really going to use up a lot of my 2.5" strip bin - or at least the larger 16" chunks of fabric.  What to do with the smaller one?  I have a couple of ideas but nothing firm yet.  ;-)


I also really needed to come up with a new leaders and enders project for my 2" square bin because it is really starting to overflow again and I wanted to do something new to me.  This is what I came up with - a nice and simple hour-glass and 16-patch quilt.  Easy and creates a nice secondary star pattern.

As an added bonus, I am also able to use up two very large pieces of blue and green hand-dyed looking fabrics that have been in my stash forever.  I like the fabrics but they never seemed to play well with anything else - except as a backing fabric; but, I have always thought that they looked nice together.  Since blue and green is one of my favorite colour combinations this seemed like a great way to use up scraps and stash - win, win!


To create this I just used my 2" squares and die cut the 6" finished (6.5" unfinished) hour-glass units (Studio die 50034, Go die 55002).  You can use any technique you might want for the hour-glass units - you can die-cut, use rulers etc. in the end you will achieve the same result.

Why do I like to have my scrap projects decided and lined up?  I like to use up what I have and I like to know where I am going with my scraps.  Plus, I love having scrap quilts on the bed - somehow I feel better sitting on a scrap quilt rather than a planned quilt - silly I know - but hey!

So what about you?  Are you planning any scrap quilts for the New Year?


Saturday, December 21, 2013

Snowy Scrap Quilting

Hi all!

I hope that you are all enjoying this fine holiday Christmas season!  I don't know about where you are but we have been inundated with snow, snow and more snow these past couple of weeks.  And, although it's pretty, it makes me want to hibernate LOL!

So, today I decided to pull out my 2.5" strip scrap bin and do a bit of scrap quilting with those strips that have been slowly accumulating since I started processing them back in 2011.  I have done a lot of things with these strips but I thought that I would make a serious impact on that bin.

I remembered Bonnie Hunter's Scrappy Trip Around the World pattern on her site and thought that it would be perfect for those longer strips.

As you all know, I love to die-cut, so, I decided to use my cutter instead of rotary cutting if I could.  The strips were already cut out to 2.5" width so I just needed to cut them to 16" lengths - unfortunately I don't have a die for that :-(


Next, I sewed them into sets.  I really only paid attention to value and not colour like Bonnie recommends. 


Next I pressed and sewed into tubes and then placed them on my 2.5" strip die.  If you're going to try this remember that you instantly have 3 layers of fabric.  I chose to cut mine like this so that I could line them up easier.


Run them through the cutter and voila!  Perfect strip sets :-)  I am not going to give you the directions to the pattern you'll have to hop on over to Bonnie's site for it - it is a great way to use up scraps!

Now to get back to sewing! 

Happy Quilting!

Wednesday, November 27, 2013

Waste

Hi all!

One of the MOST frequent questions I get asked is about the waste created by fabric die-cutting.  There is a huge misconception that die-cutting is very wasteful.  And that is simply not so.  I frequently tell people that "blaming your die-cutter for wasting fabric is like blaming your rotary cutter for wasting fabric."   We wouldn't blame our rotary cutters for waste would we?  Nope - we would call it user error.

So, since I am currently working on the Downton Abbey mystery QAL I thought that I would share the fabric waste generated from die-cutting the first 20 blocks in the mystery.  Aside - aren't the fabrics yummy!?


There are 2 of the three blocks all pieced together with the second colour-way all cut.  20 blocks all together and at the bottom left is the little bit of waste and it is mostly selvages!!


Sorry this shot is a little blurry (but I don't want to re-take it because I want to get sewing!) but can you see the little tiny bits in my hand?  The larger bits are mostly selvages.  Keep in mind as well that none of my HSTs (half square triangles) needed to be squared up after sewing - I just got to sew them together and I was done - yey!

As an aside I used 3 never used dies and/or new in these first blocks!  Yey!!

So, what do you think?  Were those little strings of waste acceptable for 20 blocks worth of piecing?  Or, was that too much?

Saturday, November 23, 2013

Squaring Up With Your Die-Cutter

Hi all!

I was doing a little squaring up today of some of my leaders and enders 16-patches and using my die-cutter to do it; so, I thought that it might be a nice little tutorial to show you how I quickly and easily square up these blocks, not with a rotary cutter and ruler, but, with my 6.5" square die instead.

When I am doing my leaders and enders projects my 16-patches come out to 6.5" square but usually need a touch of squaring up here and there.  Once I got the 6.5" square die I wanted to use it to square these up instead of my rotary cutter - I mean who wouldn't!?


Lay the 16-patch (or 9-patch or whatever you are making) across the die and take a second to line it up so that it will trim properly.  Because of the seam allowances this is instantly 3 layers so the maximum you can layer on the Go! is two 16-patches and on the Studio is three.


Put the mat on top and run it through!  Voila!  the little bits come off and you are left with a perfect square in just a couple seconds and one pass instead of all the lining up of the ruler, rotary cutting and flipping.  Easy - and I like easy.

We often think about using our die cutters to cut out but why not use it to square up too?  have you ever done this before?  I know that this might be old-hat to a lot of you but to a few of you thins might be a new idea for using your die cutters!

Are you doing any Saturday quilting tonight?

Monday, November 11, 2013

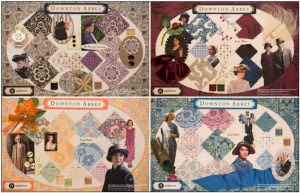
Downton Abbey Quilt Along!!!

Hi all!

I am so excited because I have chosen to participate in Ebony Love's Downton Abbey Quilt Along!!  What is this you ask?  Well you can follow the pretty picture link to find out!


After registering to participate I was sent a fabric requirement list and a die and/or rotary cutting instructions.   I am going to die cut mine so I ordered the last couple dies that I needed to be able to die cut completely - yey!

In the process of determining which dies I needed I decided to pull out the dies needed from the list.  And here they are - minus the 3 I just ordered (although the 2.5" square die I really didn't need since I have the 2.5" strip die, but, hey, it was on sale!


Wow, that's a lot of dies!  And look at the top!  There are two dies that were on the list that I haven't even unpackaged yet but already own!  That is awesome!  Thanks Ebony for giving me a reason to unwrap those bad boys :-)  Along the right are all strip dies.  There was one more strip die that I could have purchased - the 5" strip die - but since this isn't a strip size I seem to use very much I am going to rotary cut the outer border.

Once you register you will be given a link to the fabric and die list.  Don't have a cutter?  No worries!  There is also a rotary cutting chart as well as charts for Sizzix, Go! and Studio cutters on Ebony's EDeN chart - so everyone can participate no matter how you quilt.

There is also a list of participating quilt shops where you can order the actual Downton Abbey fabric kits from!  The fabric is by Andover Fabric so you know that it will be wonderful.

http://www.lovebugstudios.com/downtonabbey/

So, if you love Downton Abbey and you love Quilt Alongs I hope that you will pop over to Lovebug Studios and check it all out!  I will be posting my progress but not giving any actual requirements or directions on my page so you will have to go and register yourself if you want to quilt along.

So, who is in!!  Anyone want to sew with me?


Sunday, November 03, 2013

Sunday Quilting

Hi all!

Today I decided to get a few things done since I didn't have any set plans for the day - ahhh I love days like this!

I pulled out this super cute green Halloween fabric and almost couldn't cut it!


But, cut it I did to add this flashy first border.


I teach a monthly Accuquilt Go! Club where I feature a die or so every month.  This weekend I featured the Go! Signature die since most people don't know what this die can do!  Beyond the traditional signature block where people sign the rectangle this die can do a lot more things - so I decided to play with it a bit and I came up with this little Halloween table-topper. 

You will need the Signature die and the 3" Finished HST die to make the block.

I love how the black emulates the feel of the bats in the purple fabric.  And, I love the illusion of stretched stars across the quilt. 


After deciding on the borders for my fall log-cabin quilt I wanted to get the top completed; so, I cut the borders at 6.5" and sewed them onto the top and NOW I am happy with the size finally!  It fits on the bed with a much nicer over-hang and will now be a functional bed quilt instead of a throw.  I also like the way that the black gives some negative space to the quilt (which was quite busy with all that orange!).

Unfortunately these two projects will have to stay as tops for the next while as I have a couple other projects that I NEED to get to next.  Ok second really because I have a really quick little project that I would like to do next ;-)  Seriously quick and little project LOL!


Saturday, November 02, 2013

I Finally Decided!

I finally decided on the borders!

After much deliberation and waffling and humming and hawing I finally decided on borders for my Halloween log cabin :-)  Yes, yes, I know that it is after Halloween - so from now on this will be a fall log cabin ;-)

I have already changed my mind about this quilt at least three big times.  I had a size in mind and decided that I didn't like it - so I made it bigger.  Then I still didn't like the size so I wanted it bigger again - and I was going to piece the border; but, I couldn't decide how to piece it because I kept changing my mind.


Well, today I was in a LQS teaching a class and I saw this fabric (it is already in the blacks a bit) and it all fell into place - why not just add a border - nothing fancy - just a border?  The quilt is already busy enough and it doesn't need more craziness.  So I bought enough of this funky black and grey print to add 6.5" straight borders to the quilt.   The print is darker in reality and really fun.

Sometimes I over-think things!  K.I.S.S.!!!!!

What do you think?  Is the simple solution the best one here?

Sunday, October 20, 2013

One LAST Jellyroll Race Quilt

One last Jelly Roll Race quilt for me - and I mean it this time - this is the last one I am quilting for our guild's charity drive - I swear!


I think I have machine quilted - hmm - 20 or so of these over the past 2 years.  And, I don't mind, honestly, I think that because I have a frame I should take on some machine quilting for charity; but, after 20, or so, of these I am about done with them LOL!  Do you think that's ok?  Is it ok if I say no more and run really fast in the other direction if I see another one coming?  Or, is that just really bad karma that will come back to kick me in the behind?

Ah well - I think this is about the last Jellyroll Race quilt my guild will be doing - they are looking for a different guild project so this should be it!

I quilted this quilt in, my favorite, FilTec Glide 40 weight polyester thread in white top and bobbin.  And even though my encoder was giving me a few problems today and then there was a hidden thread caught in the bobbin area (can you believe it was MY mistake!  Bahh I blame my kids!) the Glide thread was a joy to use as always.

All in all - it is all good - I am happy with the way this quilt finished up and I love the colours!  Who doesn't like black and white with a shot of red?

So, what do you think?  Can I run away when a jellyroll race quilt is coming near me?

Sunday, October 13, 2013

Halloween Log Cabin

Happy Thanksgiving everyone!

Since it is a holiday weekend I felt pretty good about spending some time at my sewing machine today ;-)  I pulled out my, now, 48 orange and black log cabin blocks and got to work sorting them into a lay out.

 
It took a surprisingly short time to get them into a lay out and labelled so I didn't mess it up.  Then, I got to work assembling the top.


A few hours later - voila!  I had the top all assembled and I am very happy with it!  I am so glad that I decided to go back and add the additional 12 blocks - now it is a more usable size for the bed instead of just a throw.

I also love all the different fabrics that are in this quilt.  There is some light black in there from one of the first quilts I ever made!  There are oranges from wedding and baby quilts, batiks, plaids, orientals and modern fabrics all in there together and they are playing nicely with each other.  I think that is one of the reasons I love "use it up" scrap quilt projects like this one.  Not only does the quilt use up scraps that are just too big to throw out - it combines memories from projects that all come together.  When I look at this quilt (or any of my scrap projects) I see the fabrics and remember quilts that I have made - many of which have been given away.  It is a nice tactical representation of my quilts :-)

The only thing that I am a little unhappy with is - well - still the size!  When I lay it on the bed I wish that it was a few inches wider still so that it completely covered the mattress.  I don't want to compromise the way the piecing goes out to the edges of the quilt though - I like that - hmmm - maybe a small pieced border to add a couple inches onto the quilt?

What do you think?  Add another few inches onto the top?  now's the time to do it!


Sunday, October 06, 2013

36 Little Halloween Blocks Are Finished!

Hi all!

Right before I took my boys to see a matinee of "Cloudy With a Chance of Meatballs 2" on this rainy Sunday I got these 36 blocks all done!


My 36 Halloween log cabin blocks are finished and I am very happy with the way that they turned out!  Now to print off some quilt layout numbers and get them arranged in a setting.  I would like to at least get the top done before Halloween - then I will worry about the quilting at a later date.  A nice fall print on the back would be really pretty!

UPDATE!

Just a few minutes after I posted this blog post I laid the  the blocks out, on the floor, and, I realized just how small 72" x 72" is for a bed quilt :-(


The top of my bed is 56" x 76" so the width is fine but the length - not so much :'-(  I really love how this is working up but I really feel like I need to add two more rows to the length so that the pattern will be completed and the length will be useful for a bed.  

Yup - that means 12 more blocks - not so bad I guess but I really wanted the blocks to be done - sigh.  Good news I have a bunch of left-over logs so it's not like I am starting over.  Bad news - 12 more blocks!

Maybe the size is ok as it is?  Maybe I could live with it?  Or, maybe now - If I am going to change the size NOW is the time to do it.  Hmmm.............

What would you do?  Increase the size or stay the same? 


Monday, September 30, 2013

Halloween Log Cabin!

Hi all! 

I don't know about you all but when the fall weather comes along I have the desire to do more seasonal projects.  I saw this Halloween inspired log cabin quilt on Facebook (I will have to find a link!).

So, I grabbed some orangish fabrics and some blackish fabrics and got to cutting.


Looking good so far IMO!  Now that this is all completely cut it shouldn't take too long to put together.  The cutting would have been yucky but thank goodness for my Studio cutter!

Doing any fall projects?

Monday, September 16, 2013

The T-Shirt Quilt is Finished!

The t-shirt quilt is completed!


I can't tell you how happy I am that this quilt is finished.  I learned a LOT about working with t-shirts in this quilt.  Namely that I prefer quilting cotton to stretch knits.

I also learned that if a quilt needs to be taken apart - take it ALL apart and do what needs to be done instead of trying to deal with someone else's work for sentimental reasons.   I should have taken this apart block by block and re-stabilized instead of vertical row by vertical row.  I wanted to preserve the grandmother's work - and - honestly - this was a mistake.  I should have listened to my gut on this one.  Oh well! 

It is finished now and the binding is on and the quilt is actually FLAT!  If you remember how rippled this top was when I got it I think that this quilt is a success; and, now, it can travel back to it's owners ;-)  I do like the quilt and I think that the owners will be pleased too.

Will I do another t-shirt quilt?  Probably not LOL!

Have you ever done a t-shirt quilt?

Wednesday, September 11, 2013

Thank you to Mail Delivery!

Thank you to the post office!


Look at all the goodies I got in the mail yesterday!  Yummy Glide threads and their corresponding magnetic core bobbins and the 2" finished half square triangle (HST) die from Accuquilt!  Aren't those threads yummy!?  4 of the threads are black-light threads that will glow under a black-light - how cool is that!?  Now, since my Thermore batting also came in, I can get cracking on the T-Shirt quilt.  the back is loaded - now to float the batting and top.

Happy Quilting!

Saturday, August 31, 2013

Rebuilding a Top

Happy long weekend everyone!

A few weeks ago I was asked if I could finish a quilt for some dear friends.  Apparently her grandmother had taken her husband's t-shirts and made a quilt top.  Sight unseen I said "of course!"

Before I begin this post I want to make it clear that I am not criticizing the quilter's talents or poking fun at her abilities.  I think that this quilt top is amazing and I feel honoured to be entrusted with it!  I thought that it would be interesting to show you the process I had taken to re-build this amazing and thoughtful memento so that it can be cherished for years.

When I received the quilt it looked like this.


The top was extremely rippled and the seams were wavy.  But, she had done a great job of centering the motifs and arranging the colours!


Aside from those issues though the bottom of the quilt was unfinished.  Can you see how the "no shawarma for you" t-shirt is longer than the surrounding rows?  Those rows would have to be finished off because I was not cutting off the t-shirt!

She had also stitched and flipped the un-stabilized t-shirts to sheet. At this point the top was extremely heavy and there was NO way that I could load this onto my frame - nope - no way.  It was far to way and the top would just stretch and distort further.

The sheet had to come off.  Rip-it, rip-it, rip-it.


After the vertical rows were apart I  could really see the stitching.  The quilter was obviously having some pretty large tension issues with her machine and had trouble getting the t-shirts through her machine.  The result was that there were actual holes in the seams.  I ended up re-stitching every seam.  If I had this to do over again I would have taken the quilt completely apart and stabilized each block independently and re-sewn the entire top.  For some reason I didn't.  I am not entirely sure what my rational was - but I didn't.


After the vertical rows were re-sewn I pressed woven fusible stabilizer to the back of the rows.  Again, if I did this again I would do each piece.


You can really see the difference between the un-stabilized row on the left and the stabilized row on the right.

Next I sewed pieces onto the bottom of the rows to make them all an equal length.


I used a funky batik fabric for the ends and for the border.  Sorry, you can't really see it but it's very nice and I will show more pictures later - promise.


Much flatter and straighter now - yey!  I switched around a couple of the rows by accident but I am not taking it apart now!


Here you can see the stabilized rows and how nice and flat the quilt is.

I have the backing fabric but I am waiting on a Thermore batting, a very thin and light polyester batting recommended by longarmers for t-shirt quilts, and, for some funky Glide black-light threads  I ordered.  Why black-light threads you may ask?  Well, this quilt is very funky don't you think?!  I think it would be cool if some of the thread glowed under a black light and I am sure that the owners would too!  And if I can then why not!?  It will give the quilt an even funkier look :-)

I'll keep you up-dated on my progress now that the quilt is ready to go on my frame and once I get my stuff :-)

Sunday, August 25, 2013

Minecraft Creeper Rag Quilt is Finished!

Booya!  Another finish!

I got this "Creeper" rag quilt finished ahead of schedule ;-)


What do you think?  Isn't he cute?  Not!

You might remember that in February I made the original Creeper rag quilt for my son's birthday.  Well, a couple weeks ago a friend asked me if I could make one for her son's birthday at the end of the month - of course I said yes - who could say no!?  I knew that my LQS had some green flannels in stock and I had the black flannel already so I knew that it was doable.  I ran to two different stores to get the greens and got to work right away with the cutting.

Since I have the rag dies the cutting went nice and quickly.  Since I process my batting left-overs right away I didn't even have to cut batting for this quilt - it was already done.  I also had a variegated green thread that I had used for the first one on hand so I was set to get this quilt together.

Unlike the first Creeper quilt - where I had to SEARCH for everything - ie black flannel, multiple green flannels etc everything fell into place for this one - it was meant to be done on time for another little boy's birthday.

In case you are wondering this was cut out using the large rag die from Accuquilt and the 6.5" square die for the batting.  Honestly I don't know how I made rag quilts before I die cut!

Honestly, I cannot WAIT to hear what his reaction to his birthday present was!  I think he is going to be thrilled since he liked the one that I had made so much :-)

Wednesday, August 21, 2013

Another Bed-runner Finished!

Yey!

Another bed-runner is finished!  And, I am almost done with my store samples for the fall - fall really crept up on me this year! 

Slowly I am getting through my samples  though and that makes me happy.  This one is for my die-cut Drunkard's Path bed-runner class I am looking forward to teaching.  Most people are frightened of curves but this is honestly easy and so forgiving.


I love how this one turned out - nice subtle colours in a very peaceful pallet.


I quilted this using the FilTec Glide thread that I love so much in a 1-2-3 pattern and I just love the texture it gives.  Since there were tear-drop shapes in the fabric it seemed like the right all over pattern for the quilting and that the two would gel together.   I like the back as much as the front :-)

So what do you think?  Is this a class that you would like to take?

Monday, August 19, 2013

Roly Poly Owls!

Hi all!

I decided to pull out a UFO from 2011 and get it finished!  It seemed appropriate to work on this one with my upcoming Drunkard's Path course.  You can create such cute shapes with this block!


Do you remember this from almost 2 years ago?  Here is the original link! This was a tutorial from The Tulip Patch blog that I fell in love with but never got around to finishing.  I think it was because I could never seem to find the perfect border for it.  I decided that done is better than perfect and picked the night sky print from my stash.


I quilted the quilt in Glide thread top and bobbin following the outlines of the clouds across the border and into the sky print behind the owls.  Using a brown Glide thread I quilted feathers across the owls to create some pretty cool texture.

All the owls were so serious looking that I just had to make one of them have silly eyes LOL!

Yey another UFO completed!

Sunday, August 18, 2013

Drunkard's Path Bedrunners!

Hi all!

We seem to finally be getting some nice weather this weekend!  Yey!

To gear up for September classes I have been working on some store samples for classes that I want to teach this fall.  Many people have been asking me for classes which feature die-cutting so I have been working on a new class.  I am extremely happy with how this one has turned out!


Here it is my die cut Drunkard's Path Bedrunner!  I love the colours!  This uses the large Accuquilt Go! Drunkard's Path die.


Here is a close-up for you to see how easy it is to achieve a high degree of accuracy with the die cut pieces.  I cut out this entire bedrunner in just 6 passes through the machine!  Can you believe it?!


Because I teach at two different stores I needed another sample so I sewed this up today!  Isn't it cute?  A completely different feel from the first runner - so fresh and light!

So what do you think?  Do you like 'em?

Saturday, July 27, 2013

Phoebe Throws a Fit!

I had a very frustrating day today!

Phoebe (my Pfaff PowerQuilter) threw an absolute fit at me today :-(  I was utterly stumped.


Can you see the stitching?  This is the back of the test piece when you can see that Phoebe was pretty much throwing up thread to the back and the needle kept un-threading itself.  I tried everything!  Top tension adjustments - bobbin tension adjustments - rethreading - everything!

For a while I was wondering if my new machine was broken or that I was going insane.

Then I remembered that I had just changed the needle before all this mess started.  Unlike domestic machines longarm needles are totally round in the shaft so you have to be careful that you get them incorrectly.  I thought that I had but guess what - nope! The needle was turned a little bit to the right (and I mean a little bit) and Phoebe didn't like it!  So I turned the needle a little and voila!  She started to behave again!


A little while later I had these two jelly roll race quilts all finished  and ready to be handed off for someone else to bind.  These are two more charity quilts for our guild and I think that they turned out pretty well after all of that happened!

I am so glad to have solved that riddle!

2022 Christmas T-Shirt Quilt Gift

As promised - here is the T-Shirt Quilt Christmas Gift from 2022! I did share this on my Facebook page but not on my blog, (whoops sorry!) s...