Tuesday, November 28, 2006

Newly rearranged sewing room

I thought that I would post some pictures of my newly organzied sewing room since I finally rearranged it and took out most of the kid's toys. I basically stood in the center of the room and turned around to take the pictures. I hope that you enjoy the tour :)

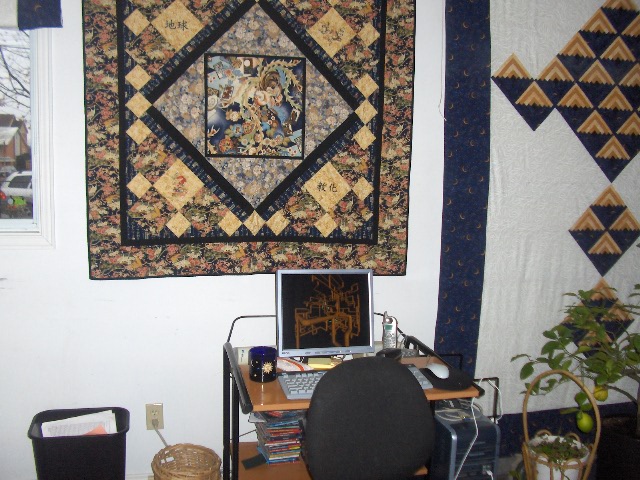
My computer area. From here I can easily connect my sewing machine to the computer via a long serial cord. I can also listen to podcasts or music from the computer while I sew.

The quilt over top of the computer is from a Kona Bay pattern that was on their web site for a while. It is made from Robert Kaufman Imperial Garden fabrics though :) You can also see the 4 machine embroideries that I did. Two are from the Pfaff Asia card and the others are two Chinese words "Earth" and "Eternity." I know, in retrospect I should have done Japanese words :)

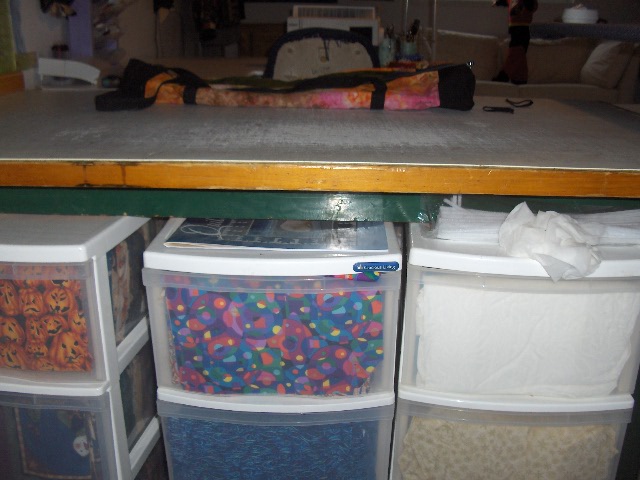
This is a picture of my cutting table and large cutting mat and half of my fabric stash. The other half is located facing the other side but still under the table. The three drawer gracious living cabinets fit really nicely under the table and I can sort my fabric by colour very easily and also by kid's prints, novelty, batik etc.


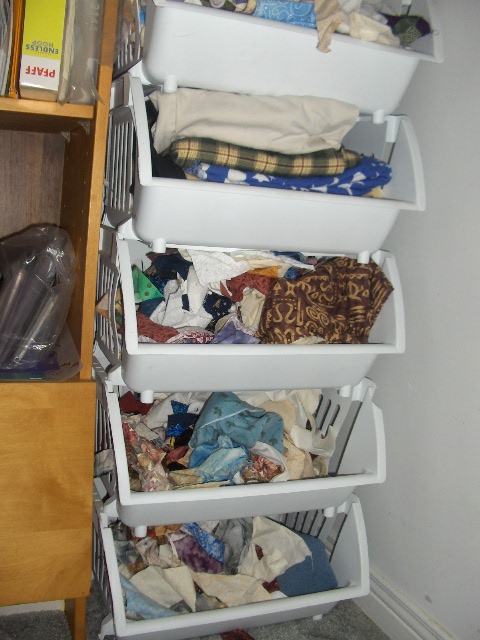
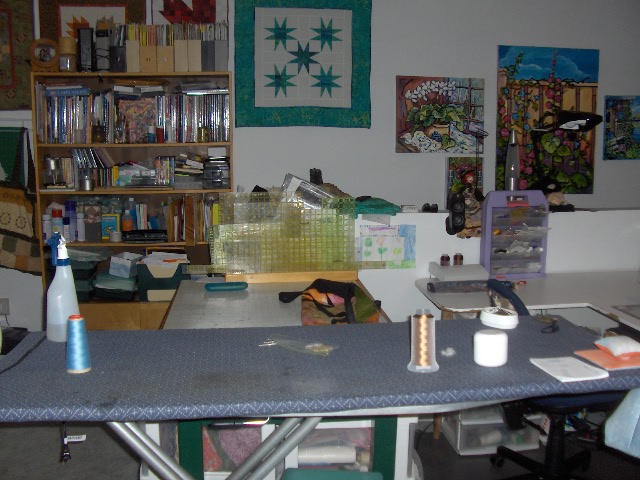
Here is my book shelf and storage area. You can also see my cutting board and hoop storage area on the left along with my magazines on top and scrap heap on the right. Can you believe that this is actually much more organzied than it was :) I also store various products on this shelf like 505 Quilt spray baste and Quilt Glide. The bins on the bottom contain quilts in progress or various bits and pieces.


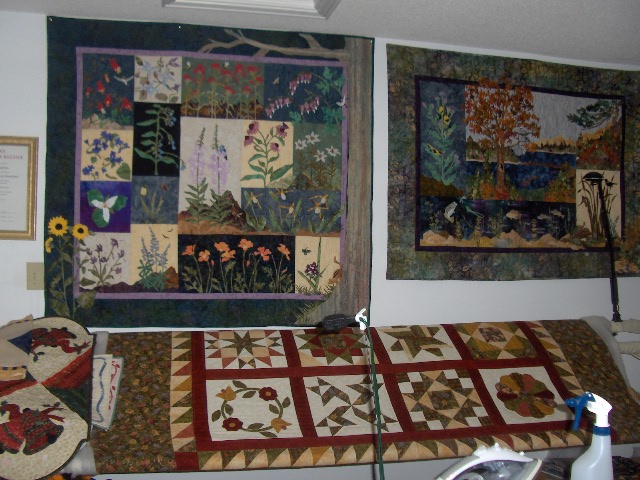
Here is my three rail Hinterburg hand-quilting frame. This also ends up being used the lay blocks on and quilt tops on while I audition threads or quilting patterns or lay-outs etc. It also ends up being a nice storage area for completed projects like my new Christmas table runner.

There is also a picture of my two Pineneedles complete arrangements. It's quite nice to sit under these two scenes and hand quilt. I have a good light over the frame so that I can see at night easily.

Here is my big board ironing board. you can see my ruler organizer and large cutting mat as well. I don't think that I could live without such a large cutting mat now :) It is the easiest way to square up between boarders and after the quilting is finished.

I also love my big board ironing board. A friend's husband made the board for me and I covered it with batting and fabric. It is the only way that I can press quilt tops and yardage easily.


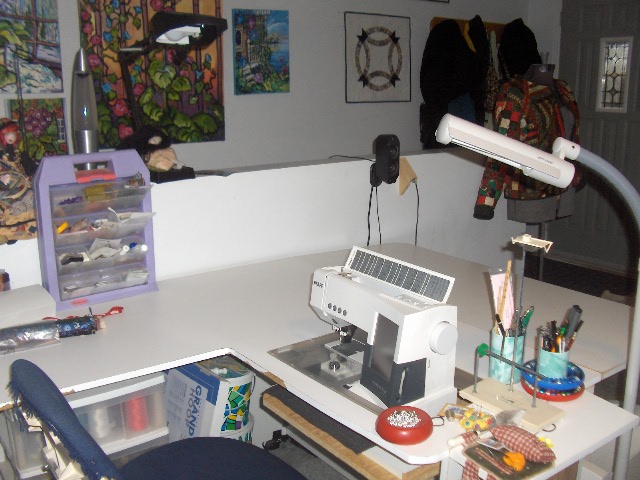
Here is my sewing machine in the cabinet that my husband made for me. We made it from the basic measurements for the Horn of America Quilter's Dream table. However, I wanted some changes. I didn't want the area on the left side to be removable so we cut one large piece so that is is nice and stable. My thread storage is under this area in another cabinet.

We added an air lift and plexiglass insert from Horn of America. I ordered these from my LQS that sells Horn products. They were very easy to add onto the table and work wonderfully.

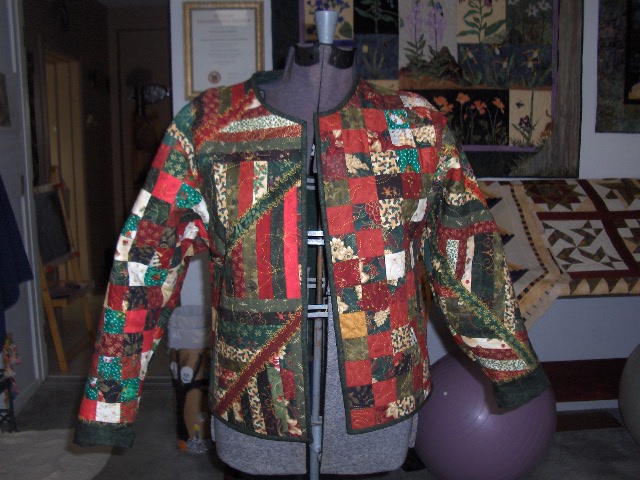
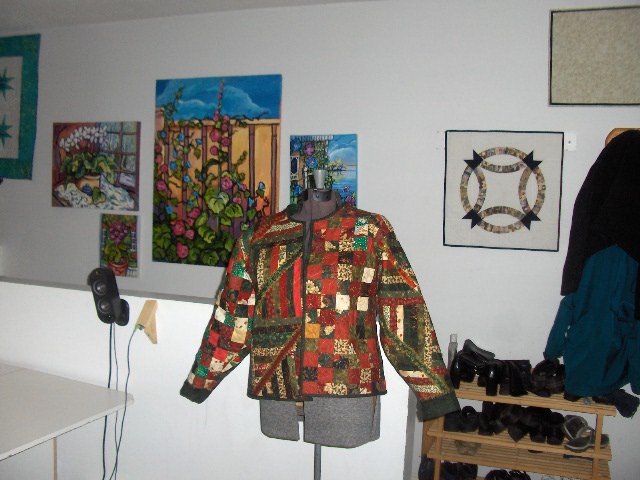
Here is my dress form with my new Christmas jacket on it. I usually have something hanging on this even if it's not a work in progress just because I like how it dresses up the dress form.

You can also see my speakers and ipod set up there. I can listen to music off my ipod or books on CD etc from this set up.


Here is my couch and with it you can see the last of the kid's toys!! We let them keep the train table in here since the trains can easily be put away and covered up.

You can also see a picture of one of my dogs, Chi, in this picture. I call her "Chi the quilt destroyer" since she chewed up a baby quilt that I was just about to give away when she was a puppy and one of my Roman shades (by accident). You can read the whole story here. Don't worry I still love her lots :)


Here is my treadmill right by the TV and computer and in plain view so that I actually use it LOL! :) I like working out on it at home since I can watch TV, listen to music or podcast or books on CD while I am working out :) I can get 20 minutes to 35 minutes on it without any fuss. When it is in my quilting room as well it reminds me not to sit at the sewing machine all day and actually get up and do something else :)


Well I hope that you enjoyed the tour! This will not be the last rearrangement of this room I am sure but hopefully this one will last for a while :)

Monday, November 27, 2006

A bit more on yo yo's

I just found this link from the blog that I posted about yesterday The Di Mill blog. This link is from Clotides Sewing Savy Magazine and it is a free pattern for a yo yo Christmas tree wall hanging and it is tooooo cute.

The wallhaning would be way easier with the Clover yo yo tool that's for sure. I think that I am going to have get one of these because ideas are just running through my head. That and the fact that it is a new gizmo and I love tools. And I love rulers too :) There are so many out there and all of them have a purpose.

Looking at different sites about yo yo quilts has also been a real eye opener. I found this site from the Alaska State museum that has some great information on it and considerations for using yo yo's in wearable pieces. I also found the Sunshine Creations blog where she shows you how to make a yo yo friend.

There is also great instructions on the Heather Bailey Blog here on how to make yo yo's the traditional way.

I also found this great blogpost on using yo yo's on a scarf here it is Anna Maria Horner's blog and I absolutely love the colours that she uses.

Why do I have this great excitment at the idea of making yo yo's; well, here is a picture of my scrap heap. I am very proud of how much less fabric is in this heap than even a year ago but I would really like to get this down a bunch more. I know that a lot of you are probably saying "That's nothing" but keep in mind that I have separated out all my UFO's from this and I have been actively working on decreasing this. I have pulled probably 75 preemie quilts out of this pile as well as my scrap tablerunners and scrap sweatshirt jackets. I feel very sucessful using stuff up and "making something from nothing." Now I look at this pile and I see a whole big bunch of yo yo's just waiting to happen.

I am also going to join an online group that works on completing UFO's for 2007. Now I just need to catalogue all of mine and get down to work.

Sunday, November 26, 2006

Not too much going on today and Yo Yo's

Hi all! I haven't been doing too much quilting for the past few days. Well, for myself anyways. I machine quilted a quilt for a friend and that went really nicely. She was very pleased :)

I also made a couple of big batches of soap. I haven't made soap for a very long time so it was great to make some again. I want to get one more batch made so that I can give out sets of three soaps to our friends for Christmas. It will be unexpected since I haven't done this for a while now. A friend came over to make soap with me so that she could learn how. We had a good time.

There is a new gaget out that I really want :) It is the Clover Yo Yo Maker. I love the look of yo yo's but I never wanted to make them the traditional way. Here is the Di Mill blog that shows the tool and some projects. Pretty nifty huh? I've always wanted to make a yo yo garlan for my Christmas tree. Wouldn't that be pretty? You could just keep on adding to it and even if you weren't finished you could still hang it on the tree. The nice thing about the yo yos it that it would be nice and portable to take in the car etc. Oh yet another project that I would like to do :)

Tuesday, November 21, 2006

The Finished Jacket

I hope that you all like the sweatshirt jacket post?? If you have any questions or comments about it please feel free to post them here and I will try to answer them.

Here are a couple of pictures of the finished jacket with the binding turned to the back. I really like the way that this jacket fits and it is so cozy and warm. Perfect for wearing around the house over Christmas and New Years. I love that you can throw these jackets on with jeans or with nice dressy pants.


Here is the back of the jacket. I combined the elements from both sides of the front and the sleeves on the back of the jacket in strips. I think that it is neat how the back looks like I have a sash on. The decorative stitches olong the sashing strips really blurs the lines of the strips so that they seem a little more integrated into the jacket body.

I cut the sleeves too short so I had to add cuffs onto the sleeves to increase the length of them by a couple of inches. It was actually easier to add a cuff than add the binding :) To make the cuff I just figured out how much longer I wanted the sleeves added a 1/4" for seam allowance and added and inch so that I could turn them up. Then I doubled this measurement so that I could make the sleeves lined. To figure out the width that I would need I measured the jacket sleeve already sewn and added 1/2" for seam allowance. My Pieces ended up being 7.5" x 10 3/4". I cut this and sewed the two 7.5" sides together right sides together. You now have a tube. Turn it right side out and press. Fold the tube back in on itself with the wrong sides together so that you still have a tube with the two 10 3/4" raw edges together. Sew this onto the end of the sleeve and press. Voila you have a cuff that you can turn up. You could also line this with some batting and quilt it if you desired. I did it this way so that I wouldn't have any raw edges showing when I turned up the cuff.

If any of this isn't clear please let me know and I will try to fix it up a bit.

Sunday, November 19, 2006

Constructing a Sweatshirt Jacket.

Okay! Finally here is the sweatshirt jacket post :) I hope that you all like it.

You can see a picture of my Halloween Jacket here and my scrap jacket here if you'd like to see my other ones.

First of all choose a sweatshirt that is one size too big for you with set in sleeves not “raglan” sleeves. Some people don't like to pre-wash their sweatshirts before they use them; but, this is a matter of personally preference to me. If I am making a seasonal jacket that I will only wear a couple of times a year then I will even use an older sweatshirts that is in great condition. I seem to end up with a bunch or size LG sweatshirts when I take a medium :)

Turn the sweatshirt inside-out and cut off the bottom ribbing and the ribbing around the sleeves but leave the ribbing at the neck.. Next cut the sweatshirt apart at the seams. You will now have two sleeves a front and a back. Measure the width of the front and find the center. Draw a line down the center with a chalk pencil that you will be able to see and cut the front in half along that line. You have now just cut the two front pieces for your jacket. You can see the individual pieces in the photo.


Now you will need to “make” fabric somehow to cover the individual pieces. Here I am using scraps from my Christmas Scrap Quilt and from my Christmas Table-runner to form fabric that will cover the pieces. Some of it is already pieced and some of it is in the audition phase here. You can also use the sweatshirt as a foundation and do the stitch and flip method (like crazy quilting) to cover the sweatshirt base. There really is no wrong method here :) Just cover the sweatshirt base.

Do the same thing to all pieces. Don't worry about the excess overhanging. We will trim that later.

I always like to pin the pieces to my dress form to make sure that I like the effect that the jacket is going to have. If you don't like something now is the time to change it.

Next machine quilt the pieces. I've used a combination of the decorative stitches on my sewing machine and free motion quilting on this jacket. I wanted to quilt it so that it resembled the Christmas Quilt.


After the quilting is finished trim away the excess fabric so that the top matches the sweatshirt base.

Now is the time to cut away the ribbing at the neck. If you cut it away earlier the neck of your jacket will be all stretched out as this is all bias.


Sew the sweatshirt back together starting with the seams on the shoulders. Next pin and sew the sleeves back on. Your jacket should now look something like the photo in form.

Sew down the arm to finish the construction. Now try on the jacket and make sure that it fits. Sometimes you really have to take the jacket in around the waist to keep it from bagging out. Once you are happy with the fit overcast the seams using with your sewing machine or a serger.

Now make a 2” cut bias binding and bind the jacket edge and around the cuffs. Turn the binding ot the back and Voila you're finished :) Some people leave excess fabric around the edges and just turn it to the back but I like the effect of a binding better personally.

I'll post a picture or two of the finished jacket once I finish turning the binding to the back :)

If you have any questions or comments please feel free to post them here and I will try to answer them :) I hope that you all enjoyed the post.

Friday, November 17, 2006

Quilt Guild Bingo Cards

I've been working hard on my sweatshirt jacket and taking lots of pictures so that I can give you guys an explaination; but, I am not quite ready to do that yet :)

This month at our quilt guild it is our Christmas party (that's the other reason I want to get my Christams jacket finished). We are playing the Bingo game featured in the Fons and Porter magazine. I think from last month. These are the two cards that I made. You know it was a lot harder than I thought that it would be to pick out all the different colours with the correct theme. Well anyways I made two cards and maybe I'll win a prize. I must say though I really don't win very often at all so this would be a nice surprize. it should be fun and it's a nice idea to do at a guild meeting.

Thursday, November 16, 2006

A Season in Time - Pineneedles

I realised that I never did share with you all a picture of my second Pineneedles complete arrangement :) It is called A Season in Time and it is by McKenna Ryan.

I personally call this quilt "Joe's Heaven" after my step-father who passed away over 10 years ago. He was an avid outdoors-man and just loved nature. When I finished the top of this quilt I stood back from it and said to myself "Oh wouldn't Joe have just been in heaven to be in this scene." Since then I have called it "Joe's Heaven" and I wouldn't part with this quilt for the world :)

You can see the first complete arrangement Petals From the Heart and my favorite tools and stuff here.

I also have all the patterns and a lot of fabric to do “Rhythm of the Sea.” I have some of the patterns traced and some of the fusing done but that is as far as I've gotten in it :) I am on a UFO kick right now so I think that finishing that quilt may be in my very near future. I find that these quilts take a while to collect all the fabric for and trace the patterns. Once you get a couple of blocks done though you pick up momentum and I find that I jst can't leave it alone until it is finished. I am hoping that this is what will happen to me again :)

I have been working on my Christmas Sweatshirt Jacket and working on a post to explain my method of doing them. Hopefully I will get that finished in the next few days.

As always, if you have any comments or sujestion please feel free to post them here and I will try to answer them :)

Tuesday, November 14, 2006

Scrap tablerunner top

Hey Blogger likes me today!! Yey!!

I've been trying for three days to upload these pictures and it just wouldn't let me :)

Here is a picture of a scrap tablerunner top that I made, I am very proud to say, 100% out of my scrap heap. These are totally left-over blocks and fabrics. I had these left-overs from my pieced roman shades that I did for my quilting room. I had left over strips from the log cabin blocks that I pieced together to make the little pieced border. The blocks were left-over blocks that I had no idea what to do with so I just kept them around. Even the background and border fabrics are from left-overs. I didn't make it from any pattern i just had a certain amount of fabric and a certain amount of blocks and went from there.

I find this tablerunner really neat since it feels so Egyptian to me with the sandy colours and the dark blues. It's interesting since the root of quilting can be linked to ancient Egypt. Here's a Wiki post that mentions this if you're interested.

You can see a bit of the remaining fabric pieces that I have left-over under the tablerunner top. I'm thinking of just throwing that out. What do you think? :) Am I allowed? I think that I may deserve to throw this bit out after piecing together all those skinny strips :)
Here is a picture of my large pieced roman shade that covers the patio door in my quilting room. you can see my parrot, Virgil's, cage on the right.

The method is from Terrell Sunderman's book Pieced Roman Shades. I have covered all but 3 of the windows in my house using this method and I really like it. Here is Terrell's website Terrell Designs. Her website is great and has a lot of great information on it about the shades and also about the hardware.


This is one of two Roman shades that go with the large shade in my quilting room. I just love the "feel" of these shades. I love the high contrast between the colours and the look they give to my room.

The other twin to this shade has been ruined a bit :) During the hot summer months here two summers ago my husband decided that he would leave the window open but put the shade down so that we could have the breeze but avoid the heat of the sun. Well they were right outside this window with my neighbours dog. One of my dogs were inside going a little bit crazy beacause she wanted to go outside and see everyone. She jumped up to try and get under the shade to see out. She caught her tooth on the shade and pulled down. Yes it ripped horribly. I had to repair the shade as best I could; but, it still doesn't lay as flat as it did. I had only a really small amount of the background fabric left but I made it work. Luckily I had some extra blocks left-over so I could rip the bottom log cabin out and put in a different one. I repaired the ripped one for the tablerunner. Needless to say, my dog felt sooooo bad that she went and hid under the table and was really overly-submissive for days. Poor girl. I felt bad because she honestly didn't mean to do it.

I guess the moral of this story is that if you have extra stuff left-over from a project don't be so quick to get rid of it beacause you never know when it might just come in really handy :)

Tuesday, November 07, 2006

How I keep my top thread continious while changing bobbins

Hi all;
Well here is the post that I talked about doing in my last blog post. This is how I keep my top thread in one solid piece while I change my bobbin thread.

First of all you need to have many bobbins already wound before you start to quilt. Also, I have a sewing machine with a front load bobbin not a top loading. To change the bobbin on a top loading machine you need to remove the quilt from the machine and I want to change my bobbin without doing that and breaking the top thread. I know that there are some machines that you can wind the bobbin through the needle but you still need to break the top thread to do it.
If you are blessed with a sewing machine that has a low bobbin sensor you get a pretty fair warning of when your bobbin is about to run out. If you do get yourself into a place that it unobvious in your quilt. You can see here that I stopped right where the thread doubles up in the feather quilting. If you can, lock off your stitches with several short stitches. When you run out of bobbin thread keep you quilt where it is on the machine but give yourself a little bit of slack on the top thread. Your needle needs to be in the up position.


Remove your bobbin case from the machine. Pull the excess bobbin thread to the top of your quilt to get it out of the way and so that it won't make a nest on the back of your quilt. You can see here that I use my stiletto to pick up the thread loop from the top.

At this point put in your new bobbin.


Hold on to the old bobbin thread. Find where you left off your stitches and make sure that there isn't any slack on the top thread. Take one complete stitch to loop your top thread with your new bobbin thread. Now, still holding on to the old bobbin thread, use your stiletto again to pull the new bobbin thread tail to the top. This may take a couple of tries.


You can see here that I now have both bobbin thread tails in my hand. I carefully find where I left off my stitching and go back a couple of stitches. Now lock off your stitches again by doing a series of very small running stitches. Stop in a bit and trim the two tails. You now have a seamless line of quilting without any nests on the underside and without any visible stops and starts on the top or bottom.

Sorry these pictures are so bad :( It was hard to take these pictures by myself but I hope that they help to explain my method. I may not be the only one that does it this way but it works for me :)

If you have any questions or comments please feel free to post them here.

Friday, November 03, 2006

Yoga mat bag UFO's

I finished two more UFO's today!! These two yoga mat bags are two bags that I made quite a while ago for two friends. You can see the original post here it's from April :) Well I found a better pattern than the one that I made up since then; it is the "Purses Bags & Totes" pattern by Cindy Taylor Oates (you can see the original bag I did here) and my two friends decided that they would rather have the new style of bag since it accomidates the thicker mats much easier. I got the pattern from SewThankful and I was really happy with their service. I made some changes to the pattern (of course) instead of quilting the fabric and using a batting I simply lined it with a nylon windbreaker type material and I kept the handle as one long joined piece instead of separating it in two. I like the effect this way. I also put a two-way zipper in the bags for easier opening.

I ripped apart their original bags and pieced these two together today finally :) I was able to keep the original embroideries on the bottoms. I really had to be careful about the fabrics since I only had a limited amount of these fabrics. Something about having to rip apart completed projects really unmotivates me to finish them again; but, this time I was ridiculous :( I've had these bags ready to go for months now :( I actually feel bad that it took me this long to get to them. The bags took me about 1 1/2 hours each to totally finish so Marja and Lysa you'd better love them :) Well, at least I hope that you do anyways :)

Other than that I have been machine quilting a quilt for a woman :) I hope that she likes it :)

Thank you all for your really nice comments about winning the District Championship :) I think that it has finally registered that I won. The judges comments were that: my colour choices were really good, my piecing lines were straight, I didn't have any crossed loops, my machine quilting was good without any tension problems, and, you couldn't tell where my starts and stops of my machine quilting were. I have a way of changing my bobbin thread so that my top thread never breaks while I am quilting an over-all pattern that I am going to share in a future blog. This is probably obvious to most of you but I found this out through trial and error :) I think that the no crossed loops means that my quilting lines did not cross but I may be wrong.
Again if you have any questions or comments please feel free to post them here :)

2022 Christmas T-Shirt Quilt Gift

As promised - here is the T-Shirt Quilt Christmas Gift from 2022! I did share this on my Facebook page but not on my blog, (whoops sorry!) s...